This documentation outlines the features of our new certificates system, which is now the default for new courses moving forward. Please contact your Account Manager if you would like to update older courses to use the new system.
Setting Up Certificates
As a course administrator, you have the option to award students a certificate upon completion of a course. In this section we’ll provide an overview of how to configure and customize course certificates as well as how students can access their certificate and check their completion status.
Configuration Settings
Administrators can find the certificate configuration settings from the Session Settings page within the session environment. Navigate to your session and click on your profile picture in the top right corner. Select the Session Settings option from the drop down menu.

On the Session Settings page, select Certificates from the left-hand menu.
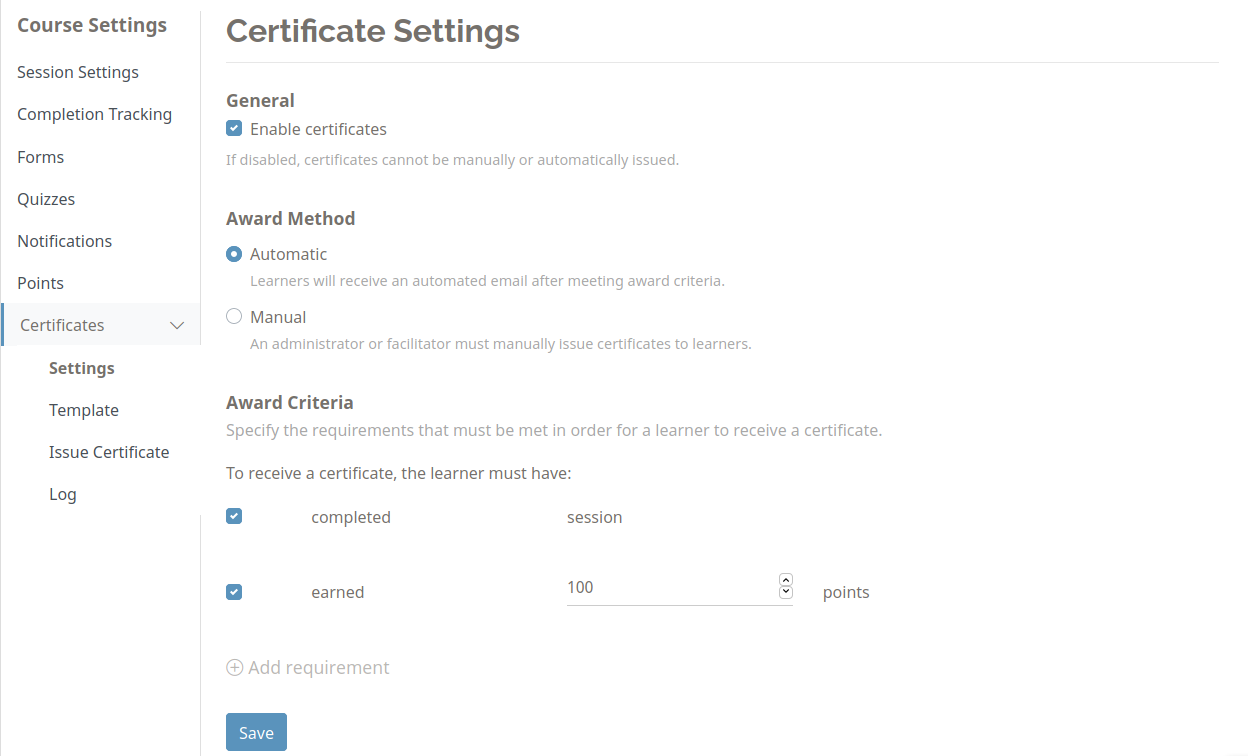
On this page you have several options for configuring your course certificate:
General
In this section, you can enable or disable certificates for your course. Note that certificates are disabled for courses by default. When disabled, students will not be able to receive a certificate in any manner.
Award Method
Automatic: Certificates can be delivered to students automatically or manually. Automatic certificates are issued based on the award criteria defined by the course administrator (see below). Once a student has met all of the award criteria, an email with their certificate will be sent to them automatically.
Manual: For manual certificates, a course administrator must issue the certificate to the student themselves.
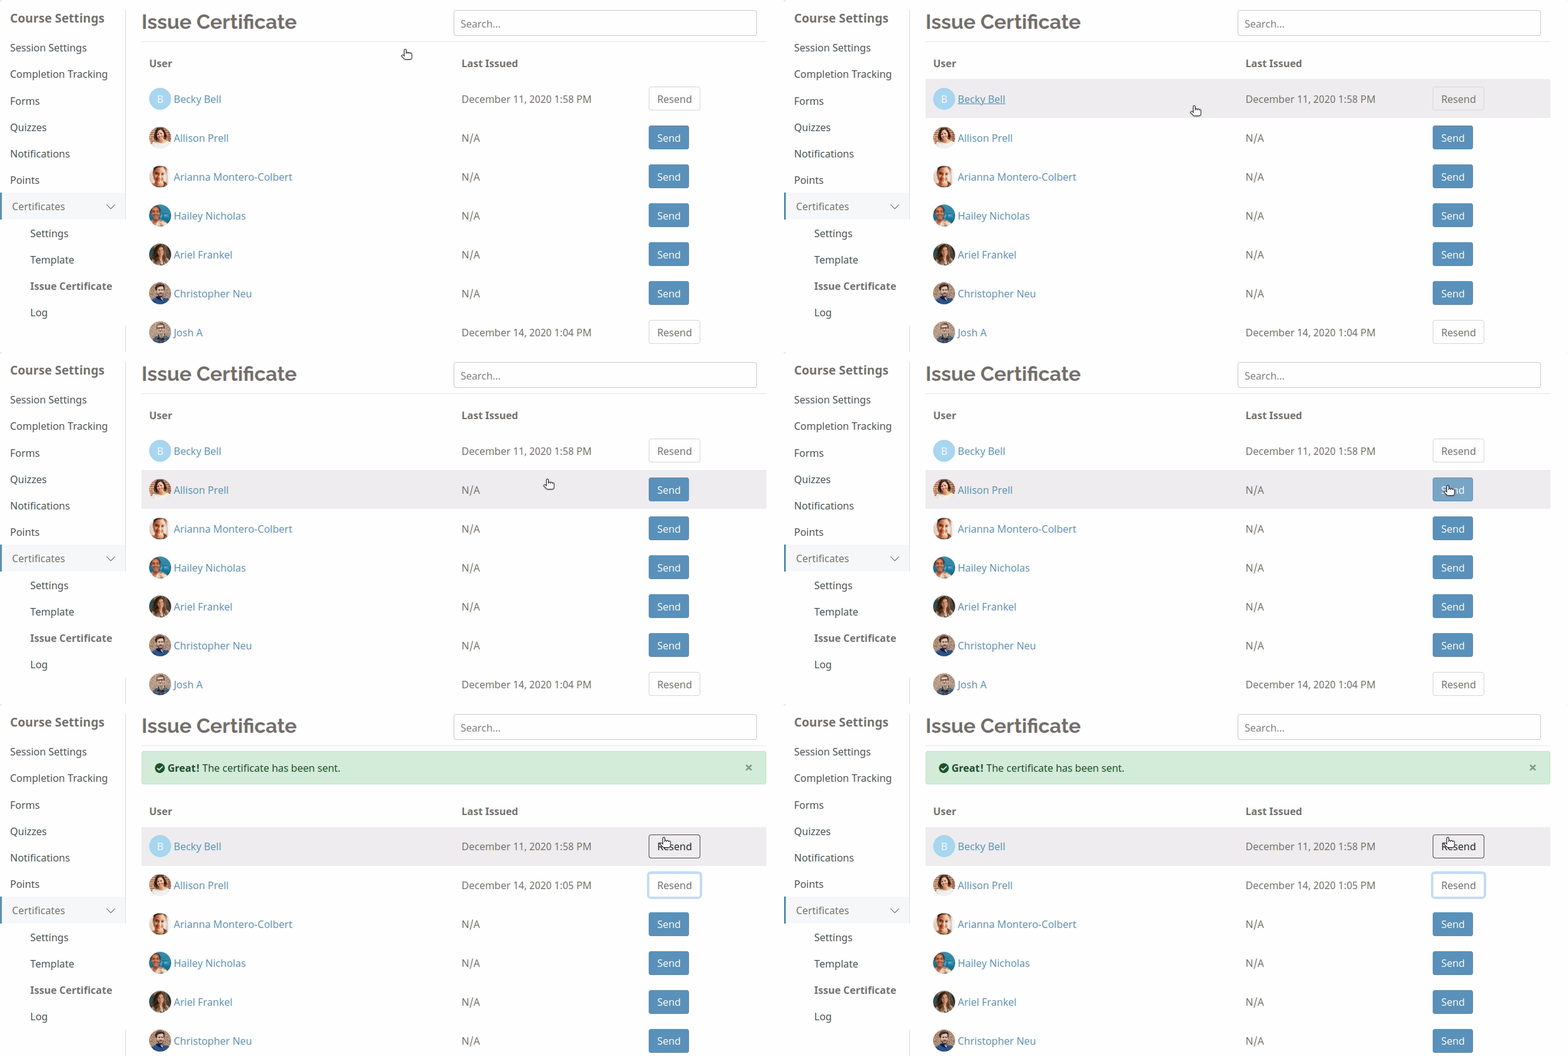
Whether the award method is automatic or manual, administrators can always issue certificates from the Certificate Issue page, which is accessible from the left-hand menu. From there you can search for the intended recipient and click the Send button. This will send an email to that user with the certificate.
Award Criteria
In this section, you can set the criteria that a student must meet in order to receive their certificate. Note that this award criteria only applies to automatic certificates.
There are two default requirements that can be enabled or disabled by checking the box on the left:
- Complete session. This option is tied directly to the completion rules that are configured from the course homepage. If this requirement is checked, a student must complete all of the requirements defined for the session in order to receive a certificate. You can learn more about how to configure completion rules for your course here.
- Earn points. When this option is checked, a student must earn a certain number of points in order to receive their certificate. If you do not wish to use the “Complete Session” requirement, this can serve as a useful proxy for student engagement. See here to learn how to configure points for your course.
You can also add your own custom requirements based on activity in the discussion forums, responses to forms or polls, and quiz performance.
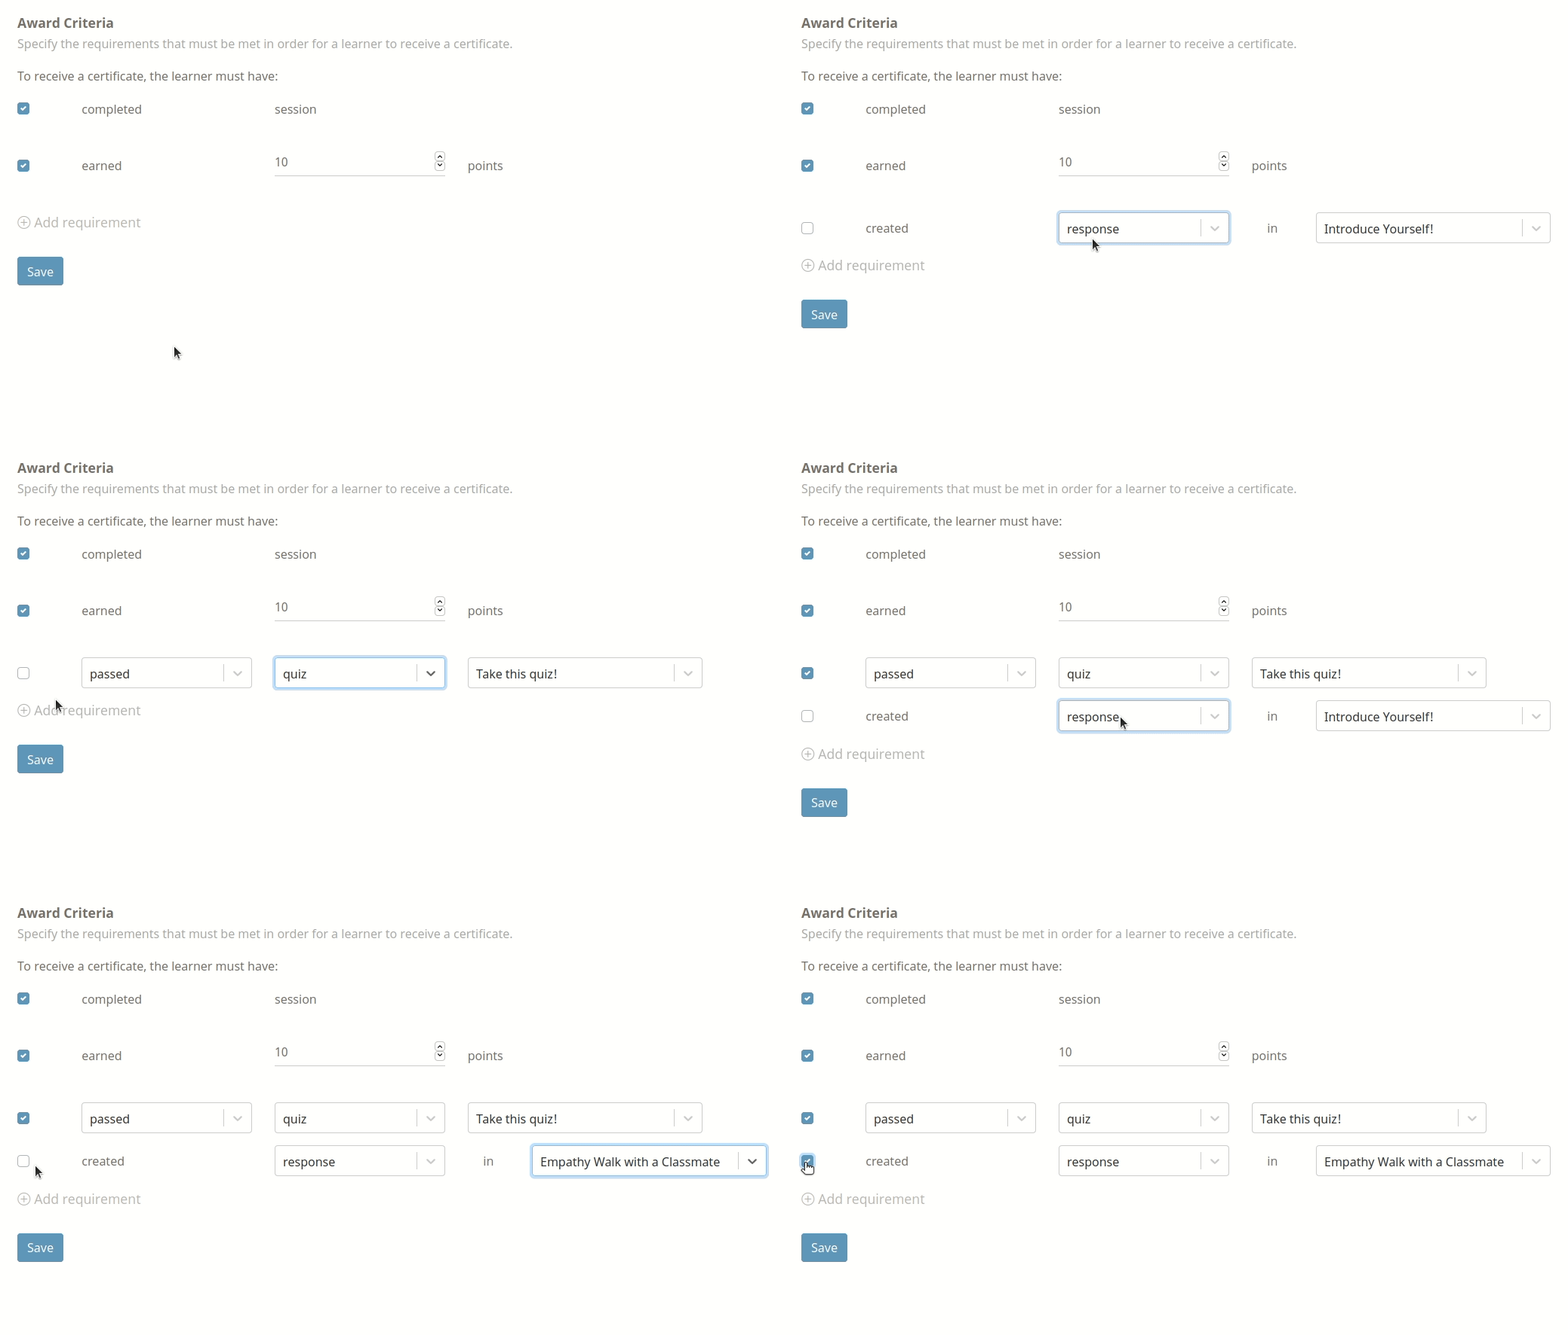
Once you have selected your desired award method and configured the award criteria (for automatic certificates only), make sure you save your changes.
Template Design
Course administrators can make minor customizations to the certificate template design. Navigate to the Certificate Template page from the left-hand menu.
Certificate templates have the following layout:
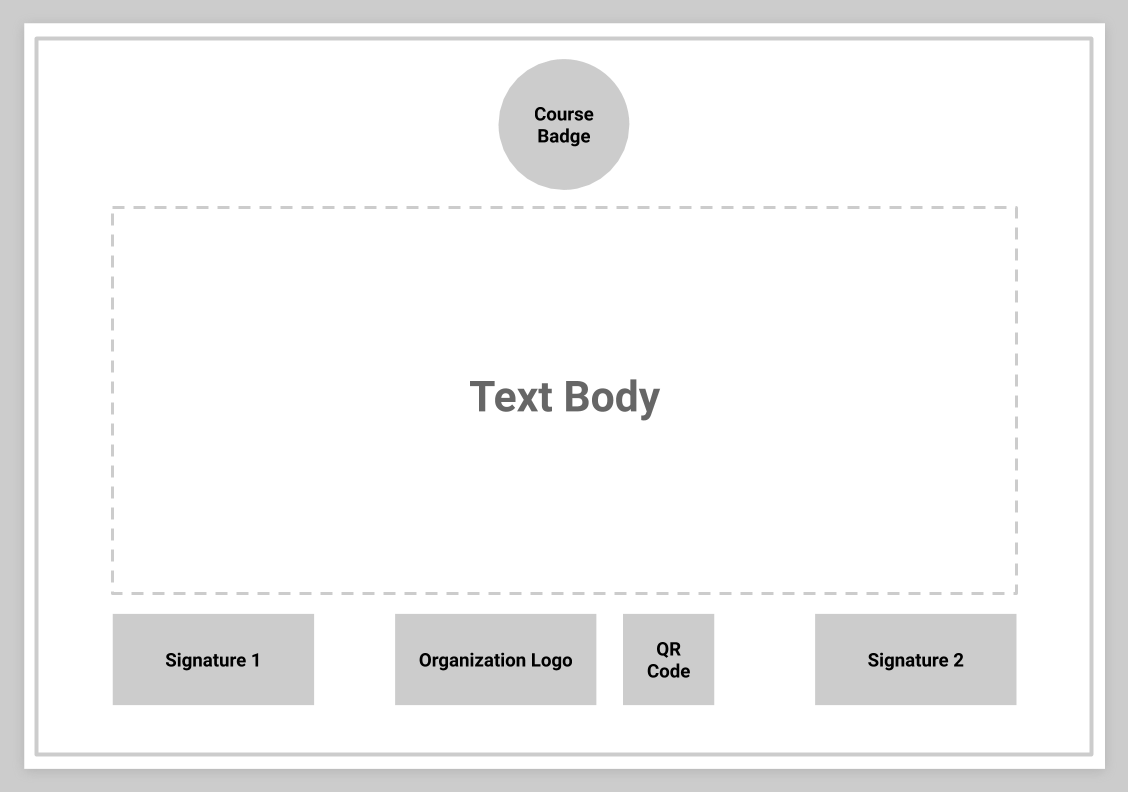
On the Certificate Template page you can change the text body of the certificate, add custom signatures, and upload images for an organization logo, course badge, and QR code. For more a more custom look, you also have the option to upload a background image to override the default border design. The preview will update as you make changes.
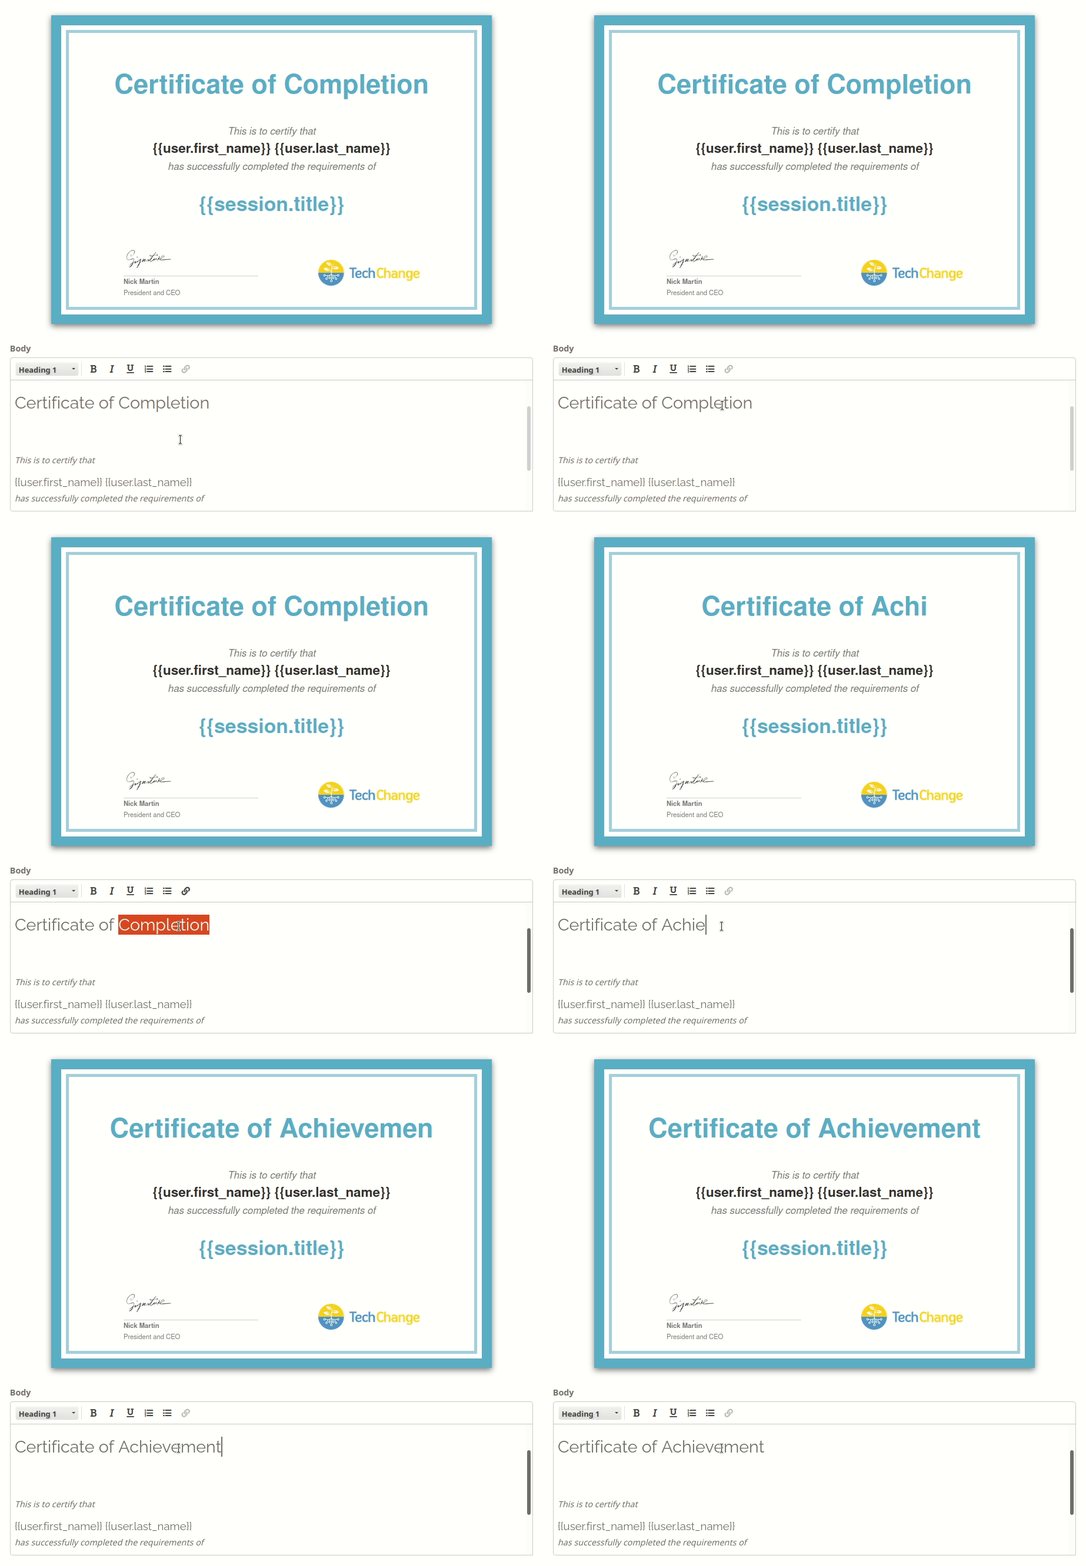
For best results, make sure you only upload high resolution images. If you choose to upload a custom background image, make sure the dimensions correspond to A4 paper format (8-1/4 x 11-3/4).
You can add the signature of an existing course expert or facilitator or create a new signature as needed.
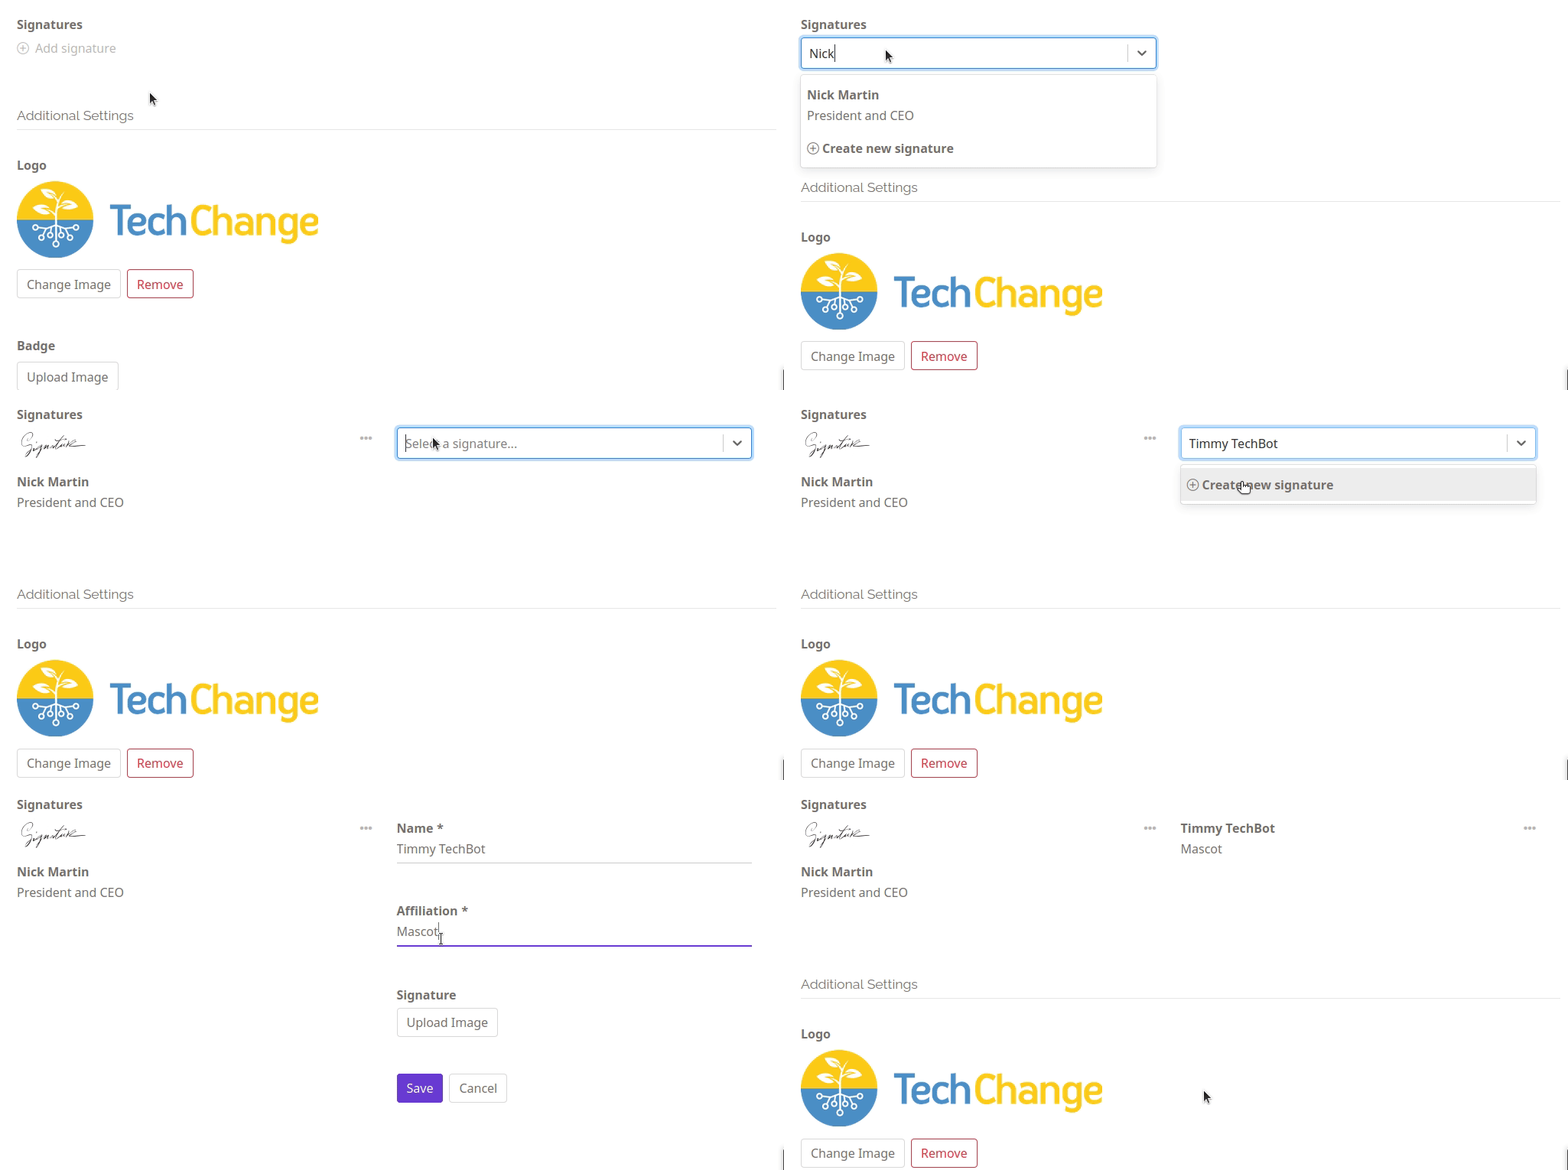
The color of the heading text is the primary color for your organization. This setting can be found in the administrator portal under Settings / Appearance.
Testing
To test your certificate configuration, make sure certificates are enabled on the Certificate Settings page and navigate to the Certificate Issue page. You can search for your user and click the Send button. You should receive an email with the certificate as a PDF attachment.
Student Perspective
For automatic certificates, students can see the certificate award criteria from their individual progress page. A student can navigate to their progress page by clicking on their avatar in the top right-hand corner and selecting Progress from the drop down menu:

When a student has not yet met all of the certificate requirements, they will see a checklist like the one below. This checklist will mirror the award criteria on the Certificate Settings page.

Once a student has met all of the requirements, they will be sent an automated email with their certificate. They will also have the option to download their certificate from their individual progress page as shown below:

Note that for the manual award method, a student can only receive their certificate if a course administrator sends it to them from the Certificate Issue page. The Certificate section will not be visible on the student’s individual progress page and they will not be able to download their certificate themselves.
Advanced
Customizing Templates with Merge Tags
When designing your course certificate, you can use merge tags in the text body to insert dynamic data. Merge tags are wrapped with double curly brackets as shown:
Congratulations, {{ user.first_name }}!
Here is the list of merge tags available for use in the text body of certificate templates:
{{ user.first_name }}
{{ user.last_name }}
{{ user.display_name }}
{{ session.title }}
{{ certificate_log.created_at }}
Configuring Organization Defaults
Organization administrators are able to set organization-wide defaults for certificates. This can be done from your organization’s administrator portal. Navigate to the certificate settings page from the side bar on the left by clicking on Settings / Certificates.
Select the type of certificate you wish to customize. Note that for now we only support certificates for courses.
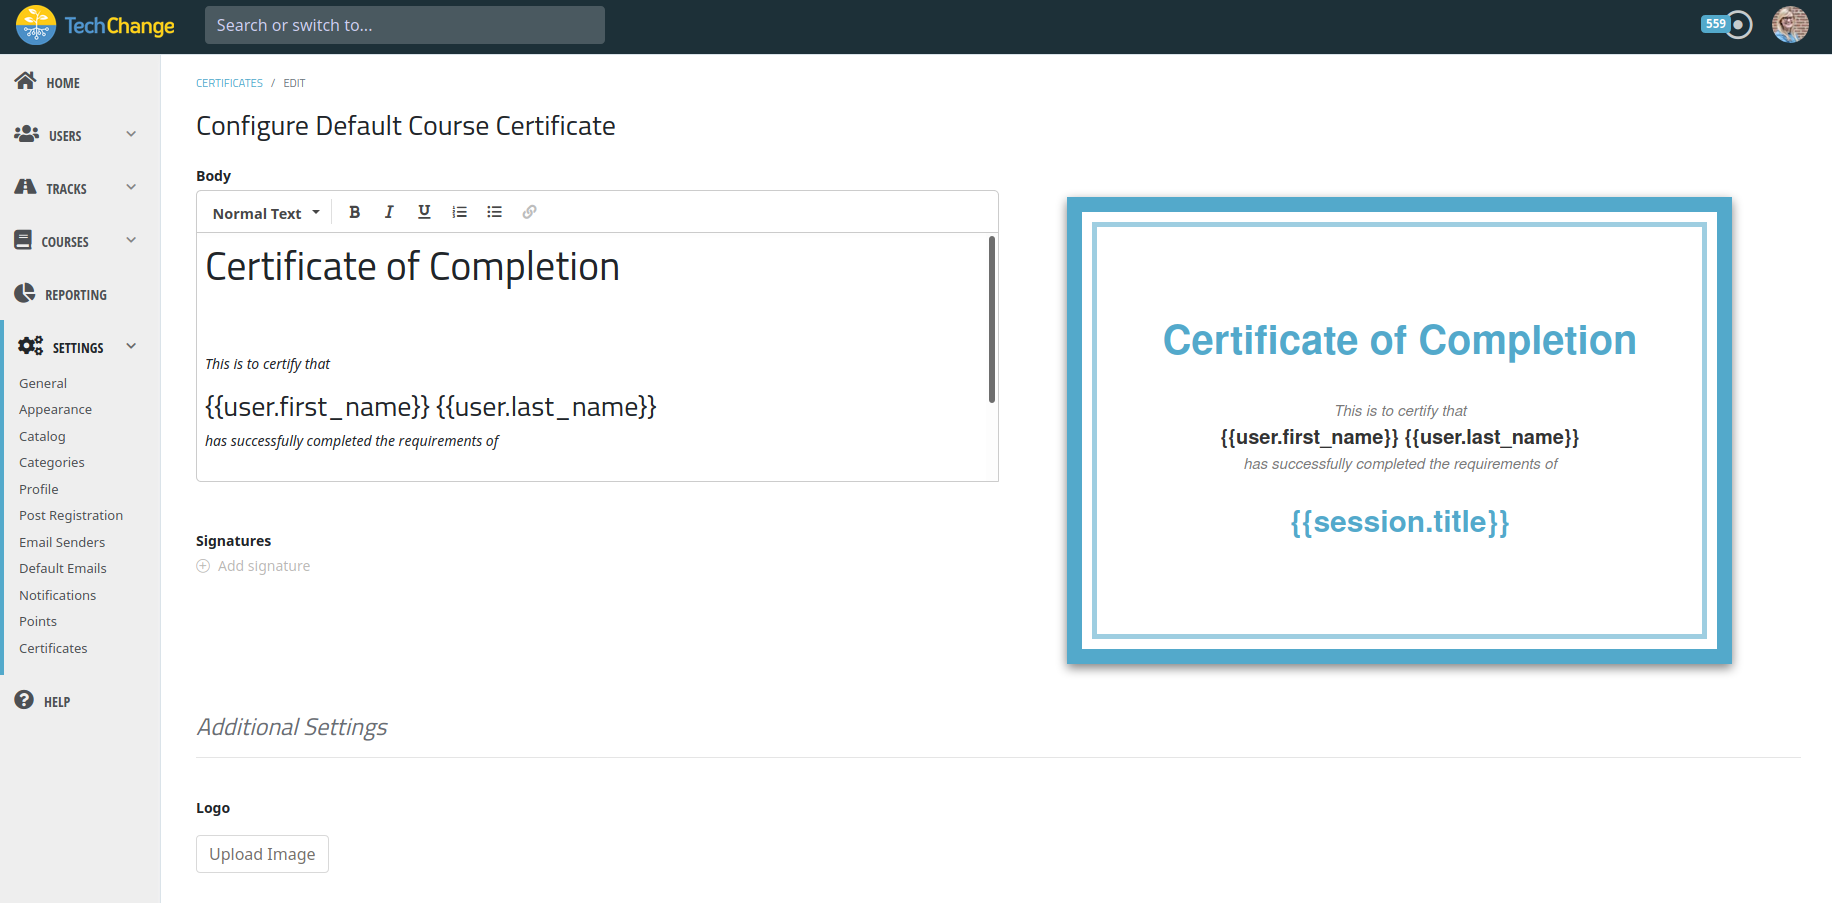
On the edit page, you have the option to edit any of the template elements described above. Once you click Save, the customized certificate will be the new default design for all courses across your organization unless a course already has an existing customized template. As a best practice, we recommend setting up the organization default first before you start making customizations for specific courses.
Certificate Issue Log
For an audit trail of issued certificates, you can go to the Certificate Issue Log page. This page provides a list of all issued certificates for the course, including the recipient and the time it was sent. Manually issued certificates will also show who sent the certificate to the student.
Cloning
As of now we do not support cloning of certificate settings. We suggest setting up a default template for your organization to streamline the configuration process.