Events
The Events system can be used to host a number of different types of events on the TechChange platform. Events help drive user engagement throughout a virtual conference experience. The Events system supports:
- Real-time events that are livestreamed directly to the TechChange platform, which include a space for users to chat with one another.
- External events that are hosted via a 3rd party, i.e. Zoom meetings or Google Hangout calls.
- Networking sessions via a Frameable integration.
Features
Events Agenda
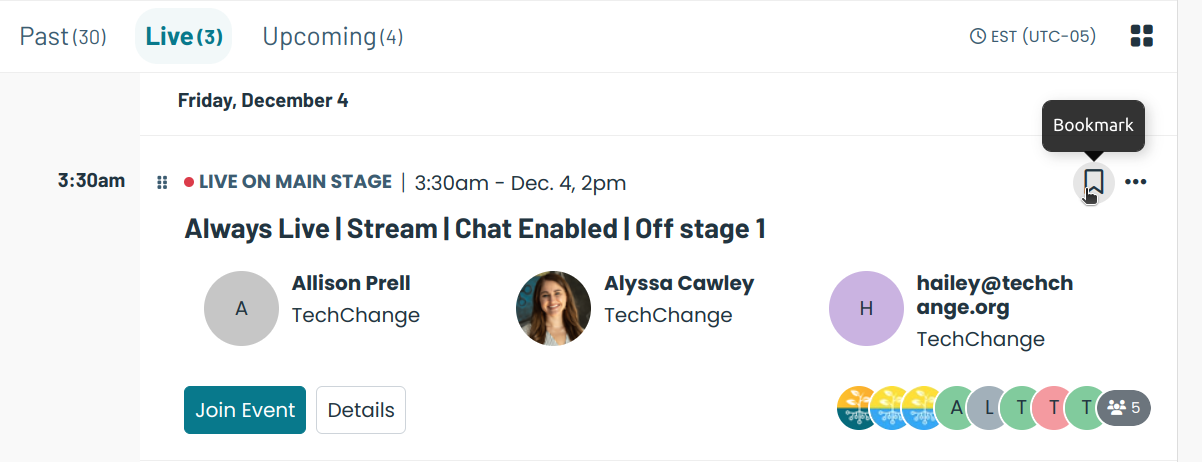
This is the default view for the Events page which will show the live, upcoming, and past events. If an event is currently live on a stage, it will be featured at the top of the agenda page. Users can search and filter the agenda page to help find the events of interest. Events will be reflected in the user's selected timezone.
Users can view a list or calendar view of the agenda.
Users can RSVP for upcoming events or bookmark events that may be of interest. These events will be shown under the "My Events" tab.
Event Details Page
This is the default view for an individual event, which will show the event applicable event details which may be set on the event including the title, date, time, description, topics, stage, and the list of speakers for the event. Additional content will be displayed depending upon the status of the event, i.e. Upcoming, Live, and Past.
Upcoming Events
The view for an Upcoming Event will show the list of RSVPed users and let the current user choose to RSVP "attending" or "not attending" to the event.
If the upcoming event is an Internal Event and has an embedded video defined, then the video will be displayed as part of the preview. An External Event will not have additional content displayed for the preview.
Live Events
The view for a Live Event will change depending on the type of event, either a Internal Event or an External Event.
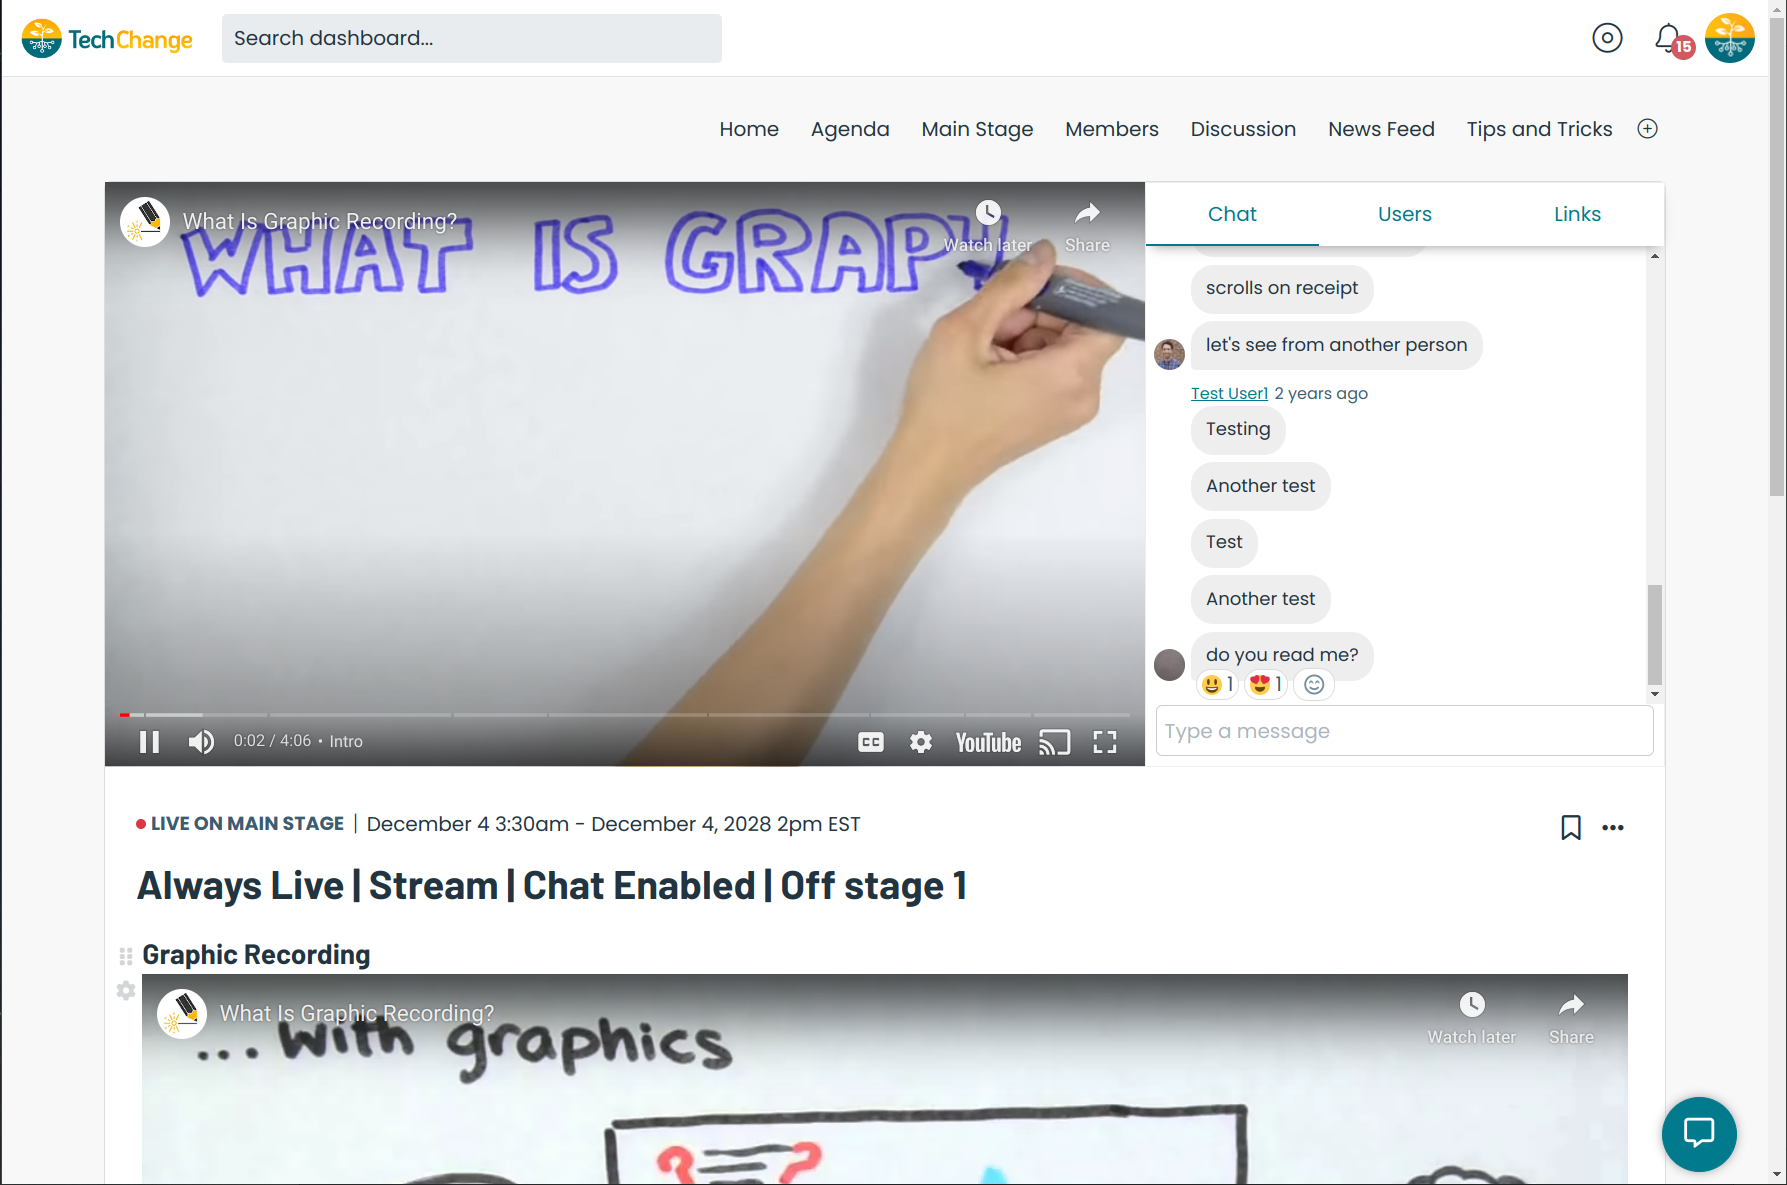
An Internal Event will go "live" on the details page 15 minutes before the event's scheduled start time and will remain "live" until 15 minutes after the event's scheduled end time. While the event is "live", the event's embedded video will be streamed to the details page and users can participate in the event using the Event Chat feature, if enabled. If a Poll was added to the event, it will also be shown here while the event is "live".
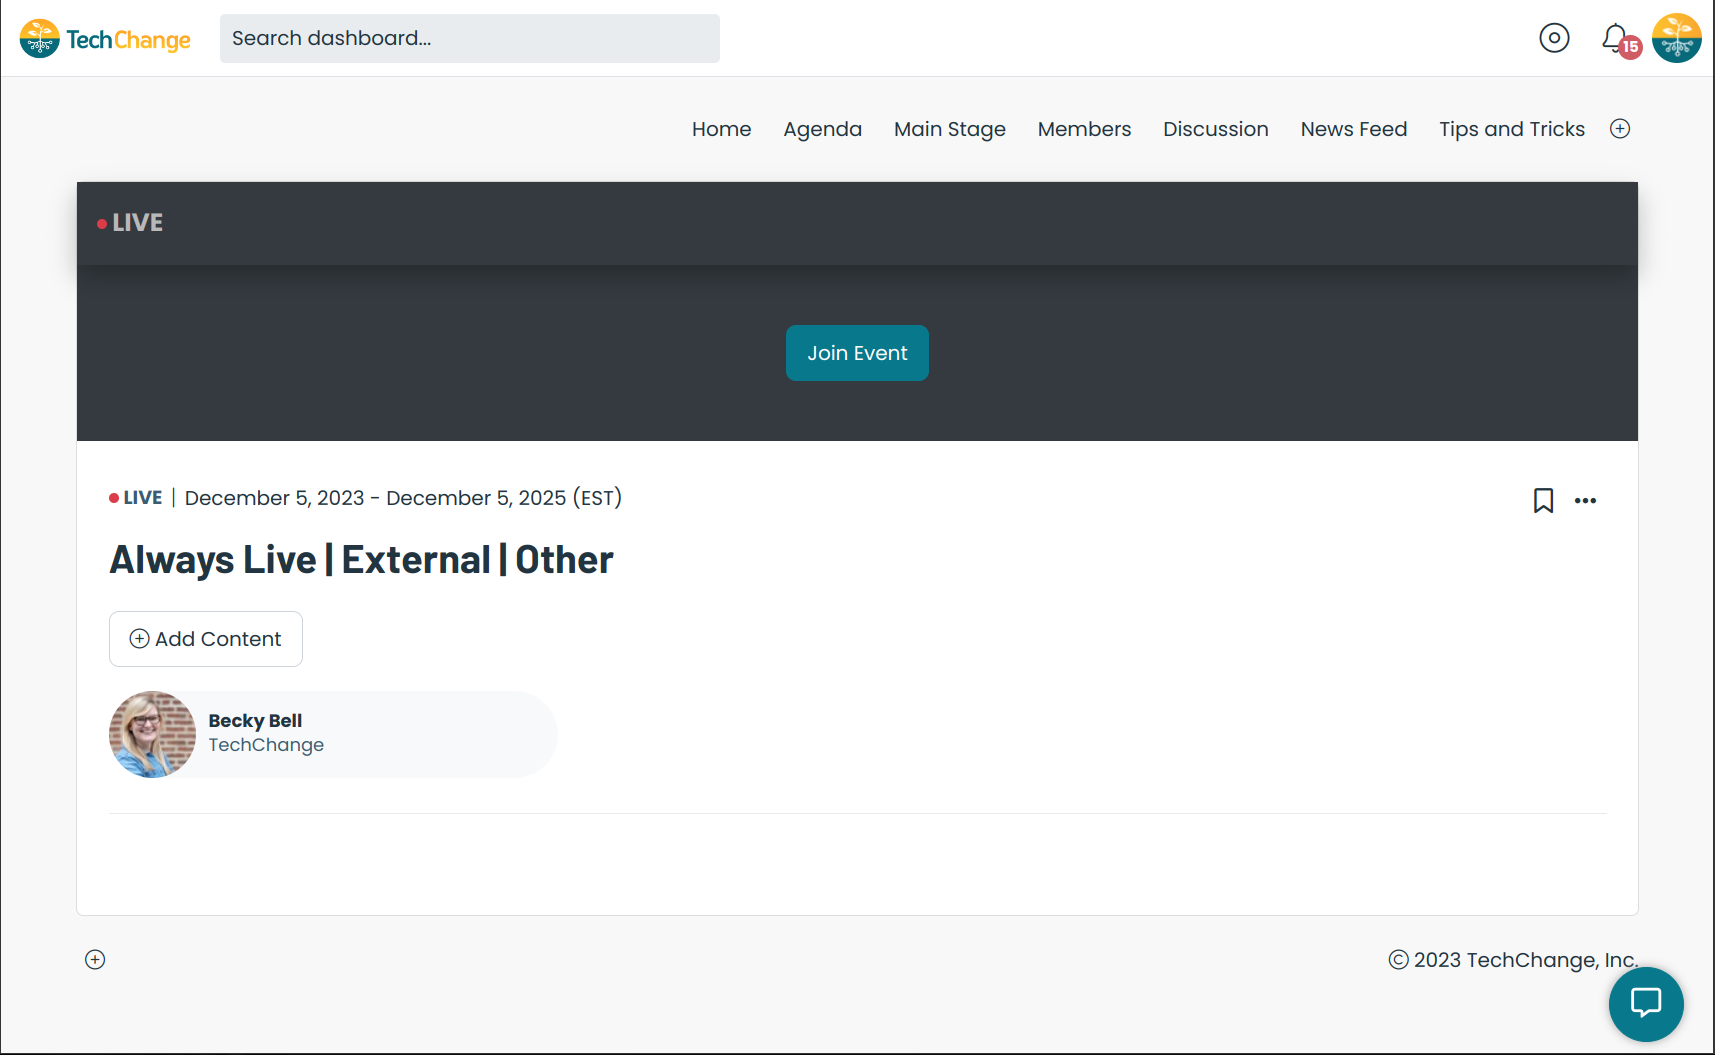
An External Event will go "live" on the details page 5 minutes before the event's start time and will remain "live" until 5 minutes after the event's end time. While the event is live, the details page will provide a link that users can click to join the external event, i.e. a Zoom room, Google Hangout call, or Social Hour room. If a Poll was added to the event, it will also be shown here while the event is "live".
Past Events
The view for a Past Event will change depending on the type of event, either an Internal Event or an External Event.
An Internal Event will display an archived version of the details page, which includes the event's embedded video and the chat feature with all past activity, if enabled.

An External Event will display an archived version of the details page, which will include a video recording of the external event (if provided).
Stages
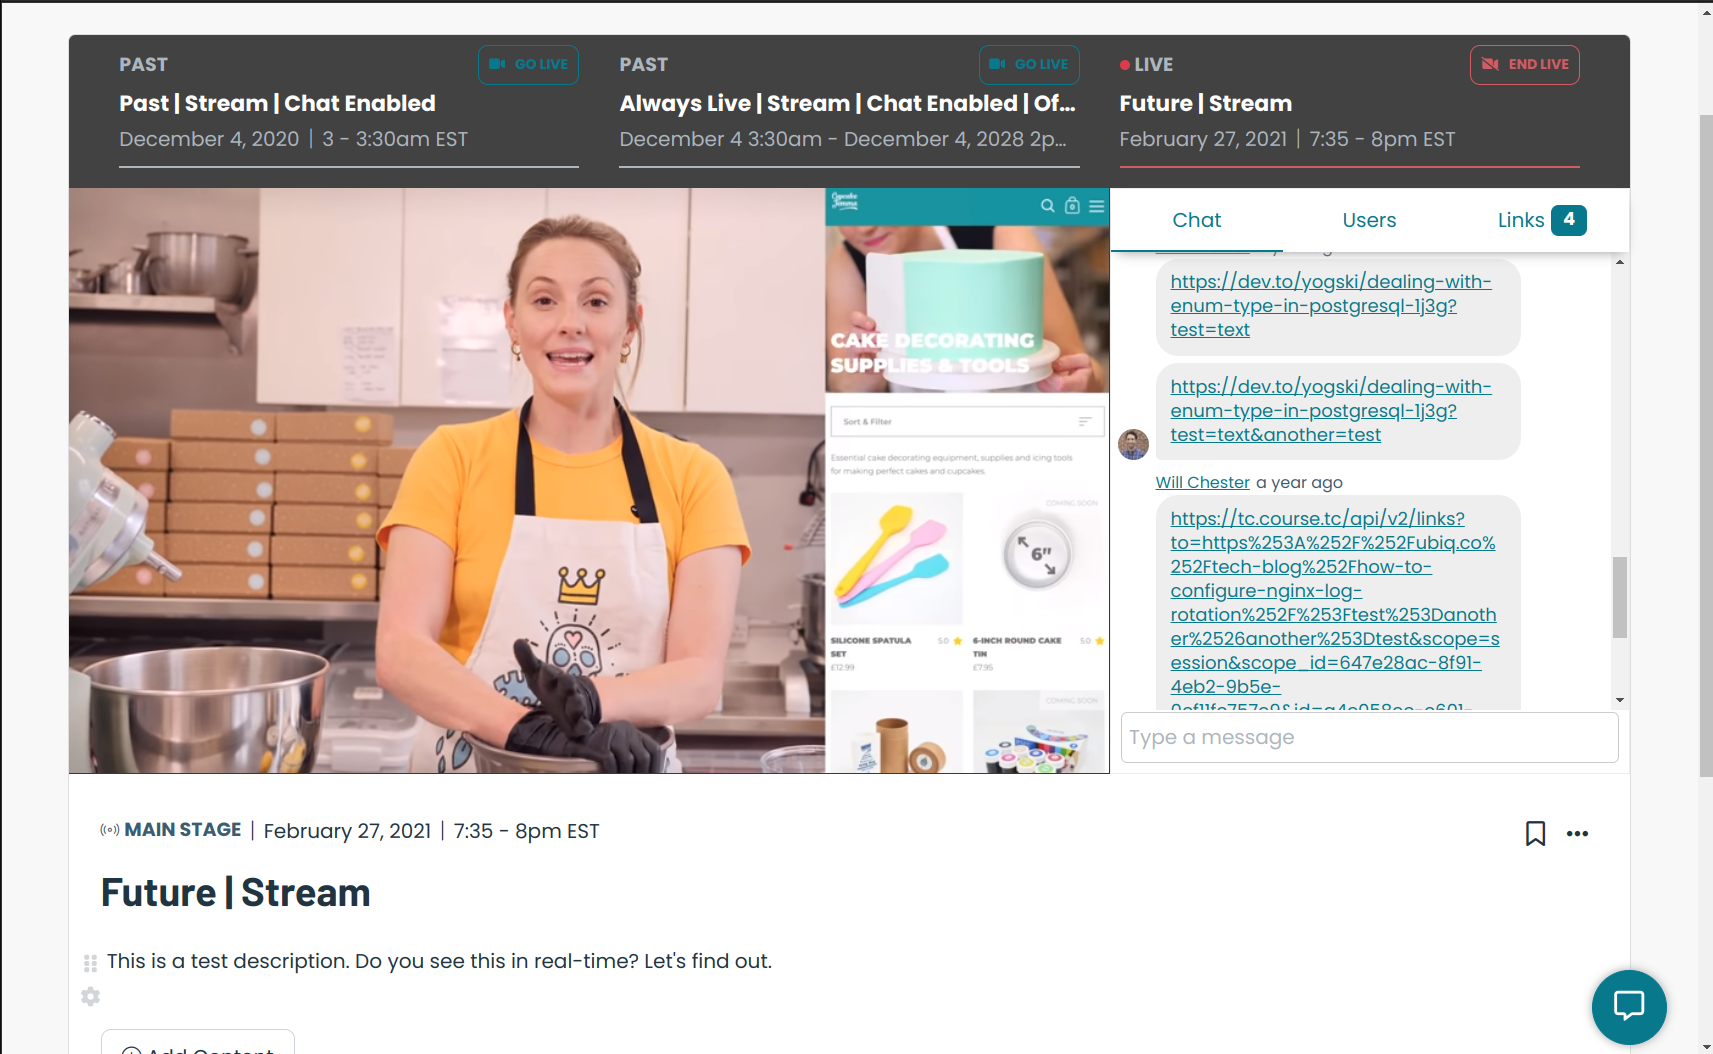
You can create an event stage which is used to host a number of events on a single page over the course of the conference. The stage details page will include a banner at the top to highlight both the upcoming and past events for the stage. When an event goes live on the stage, it will be hosted as described above in the "Livestream Events" section. Administrators can control which event is currently live on the stage and once the live event changes, the page will update in real-time for all users.
Note that the "live" behavior for a stage is separate from the above mentioned behavior for "live" events that are based on their time. For instance, an event can be past but still be "live" on stage if the administrator has yet to "End Live".
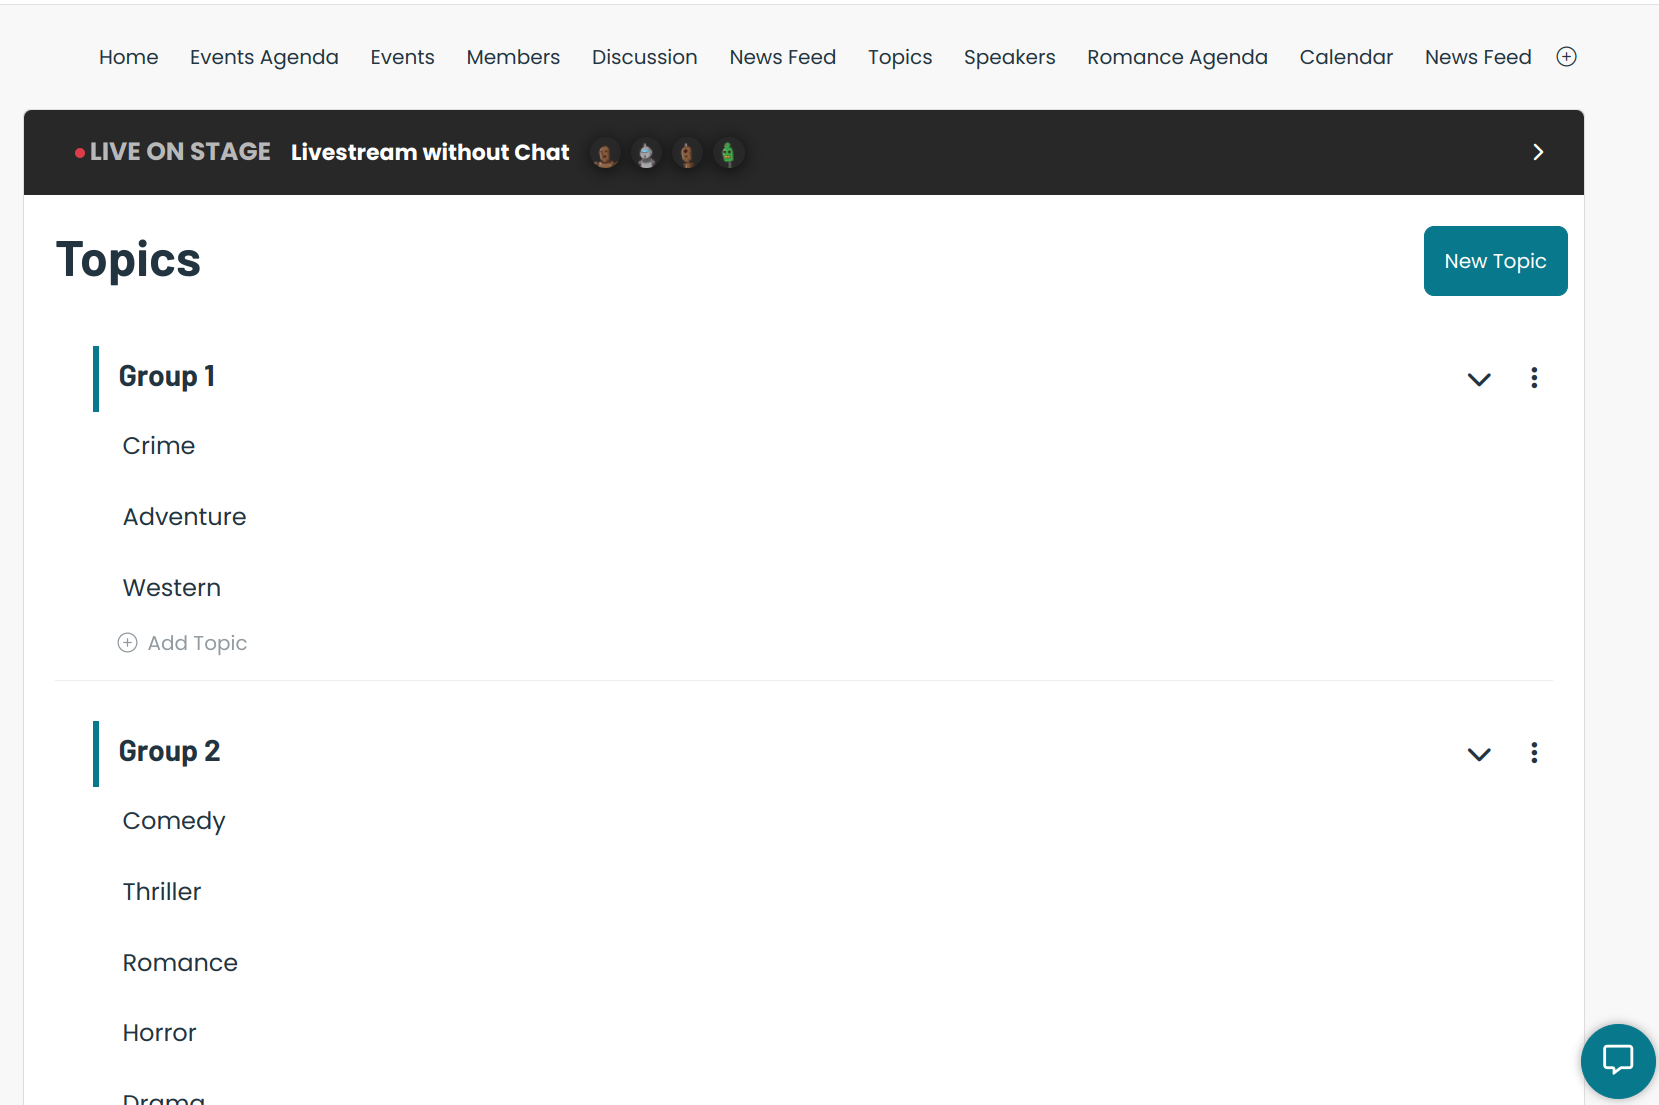
Topics
Topics help you keep events organized and easier to find on the agenda page. An event can have more than one topic. Users will be able to search and filter the agenda page based on the list of available topics.
Topics can be assigned to Topic Groups which will allow them to show up under a specific group header in the Filter side bar (or modal on mobile devices). These Topic Groups can be expanded and collapsed to help the user find topics. Topics do not require Topic Groups. If you have some Topic Groups and other topics that are not assigned to a group, the topics without a group will be displayed below the topics that have groups.
Topics and Topic Groups can be drag-and-dropped by administrators to display them in the preferred order.
A default Topic Group called "Day" will be created automatically for conferences that span more than 1 day. This will contain a topic showing the date for each day that has an event.
Topics can also be marked as "featured" which will create a "Featured Topic" bar shown below the Agenda page headers. This bar will appear automatically when topics are flagged as "featured". This bar will also be displayed containing any active filter the user currently has selected.
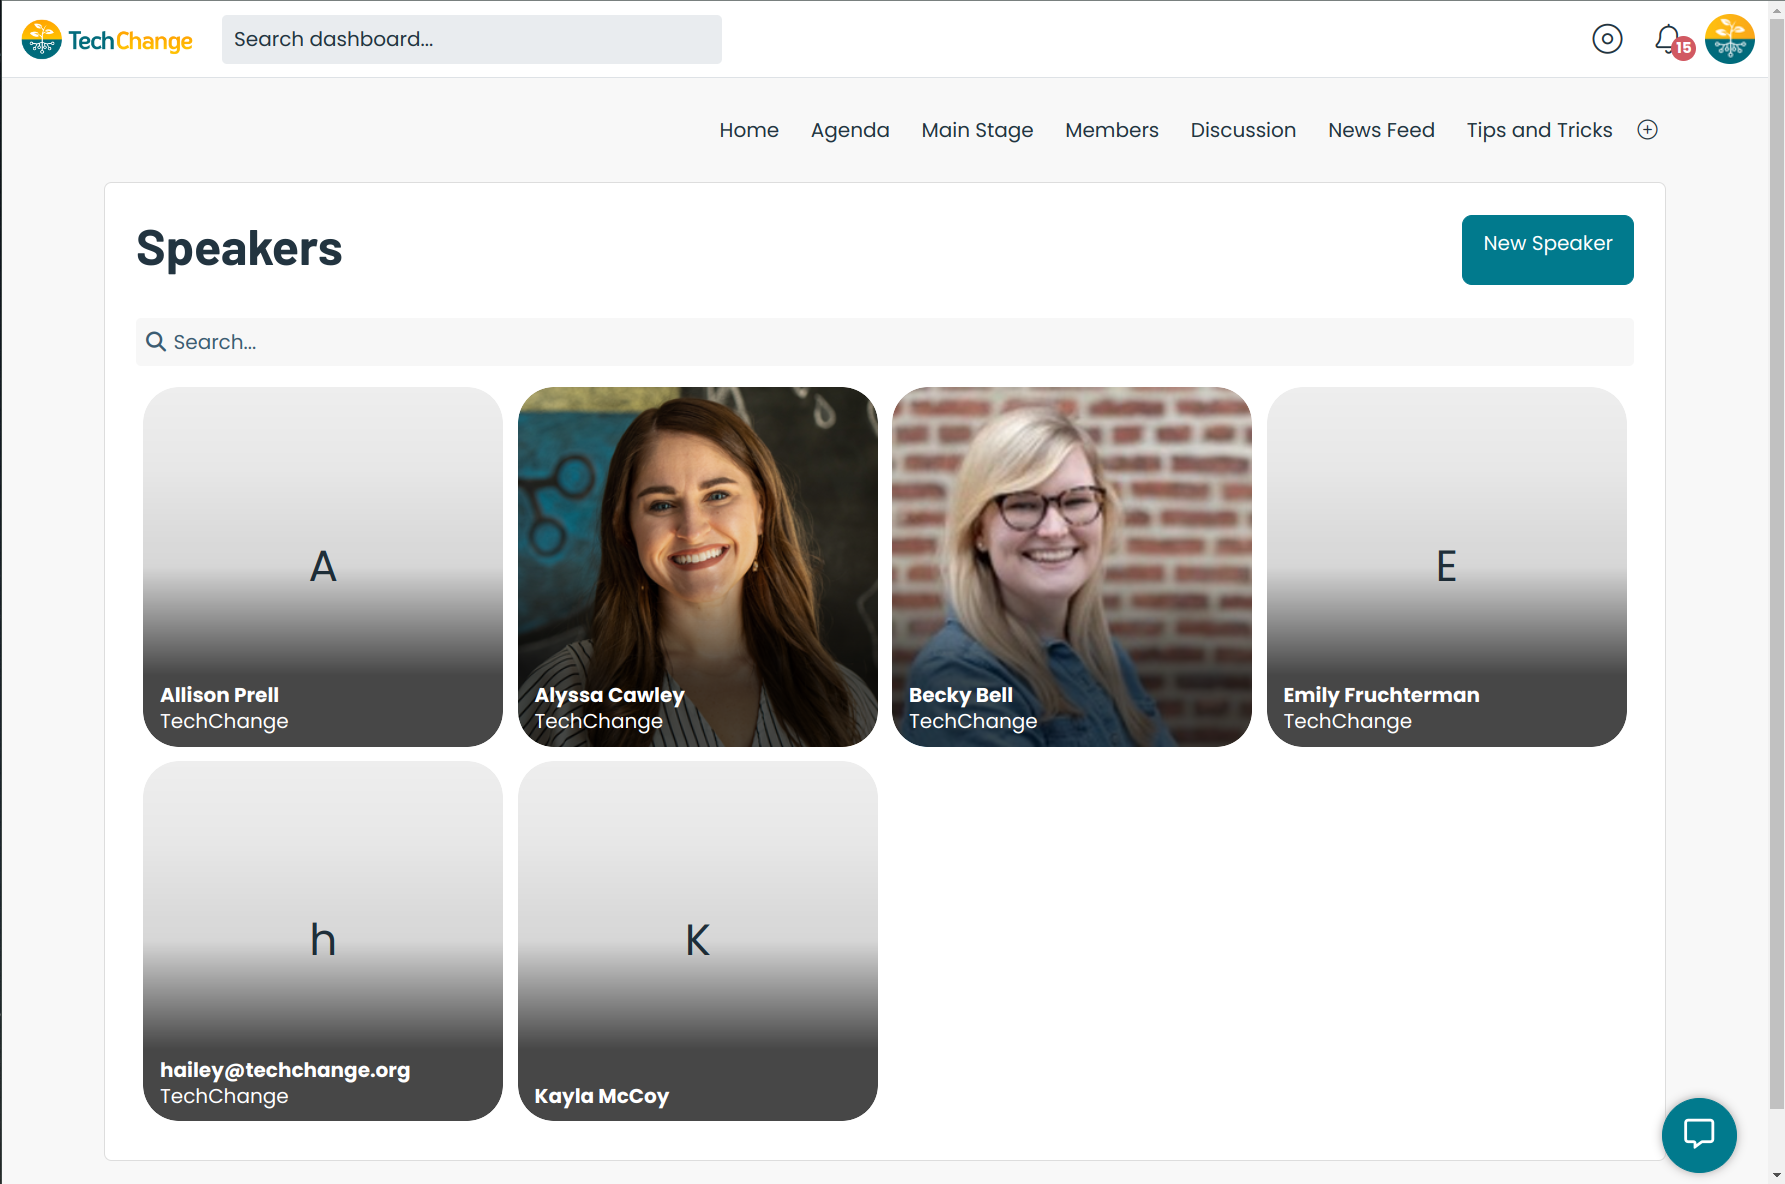
Speakers
The agenda page offers a dedicated space to highlight the list of event speakers for the conference. Each event speaker can customize their name, affiliation, biography, and image.
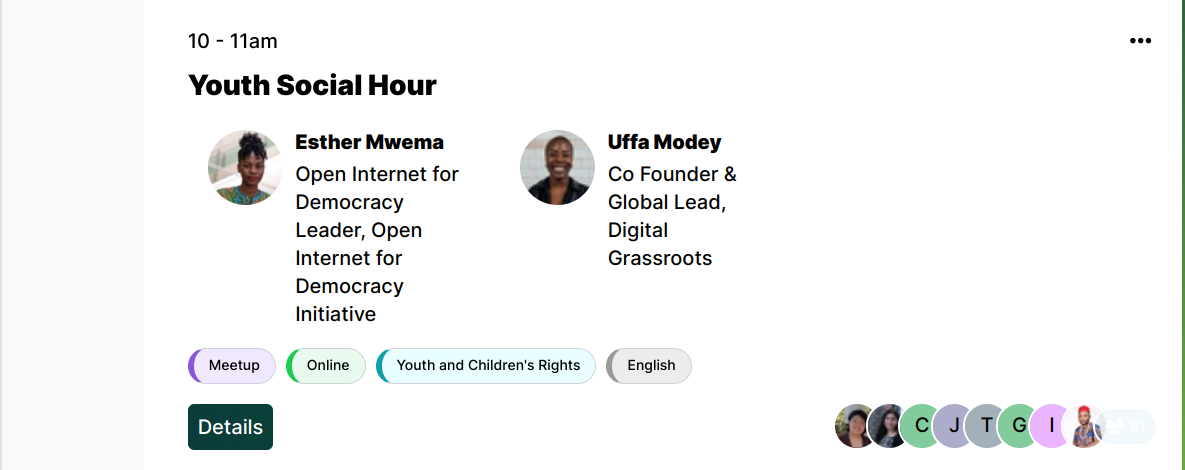
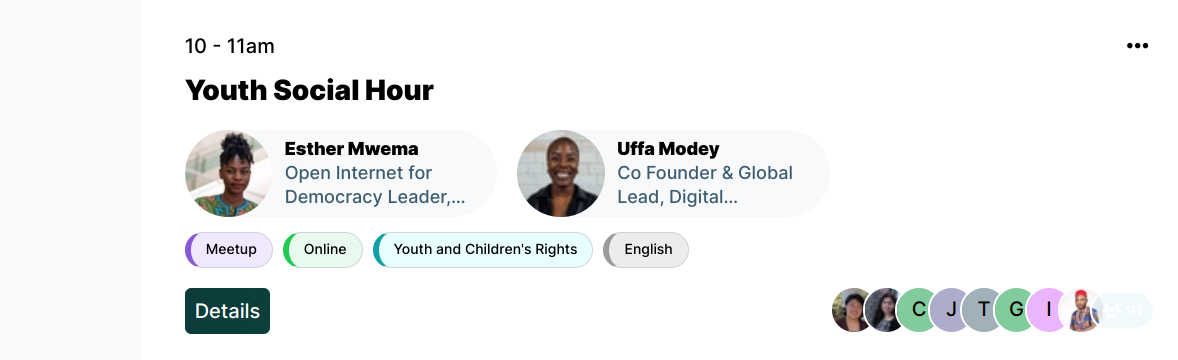
Under the "Session Settings", administrators can select a preference for how much detail is displayed in the speaker card.
RSVPs
Users have the ability to RSVP "yes" or "no" to events. Whether it's a past, live, or upcoming event, you can see a list of all your fellow users who have RSVPed to an event, find out how many will be attending an event, and get excited about the upcoming discussion. You can view a list of your RSVPed events via the "My Events" tab on the Agenda page.

Bookmarks
Users have the ability to bookmark events. You can view a list of your bookmarked events via the "My Events" tab on the Agenda page.
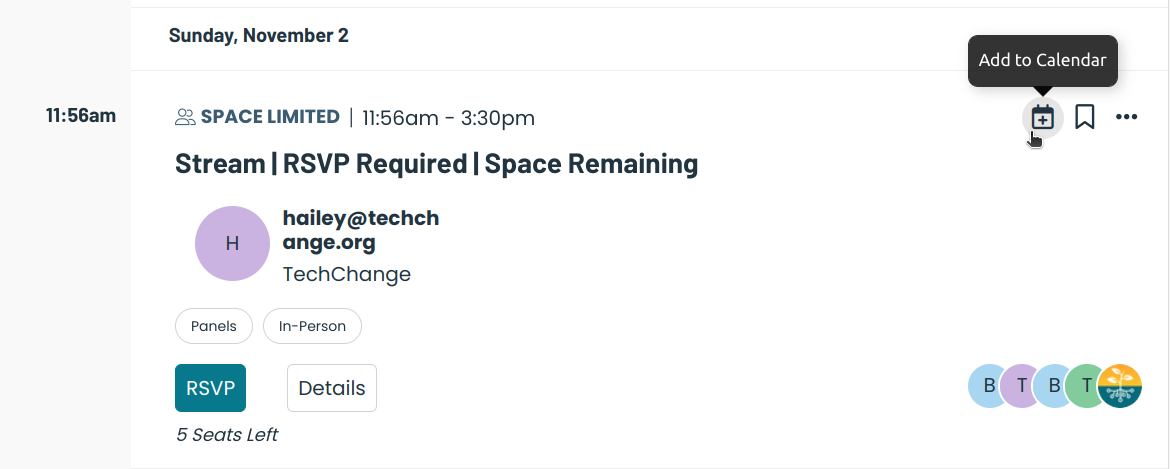
Add to Calendar
You can add any individual event to your personal calendar (i.e. Google Calendar, Outlook, iCalendar, or Yahoo).
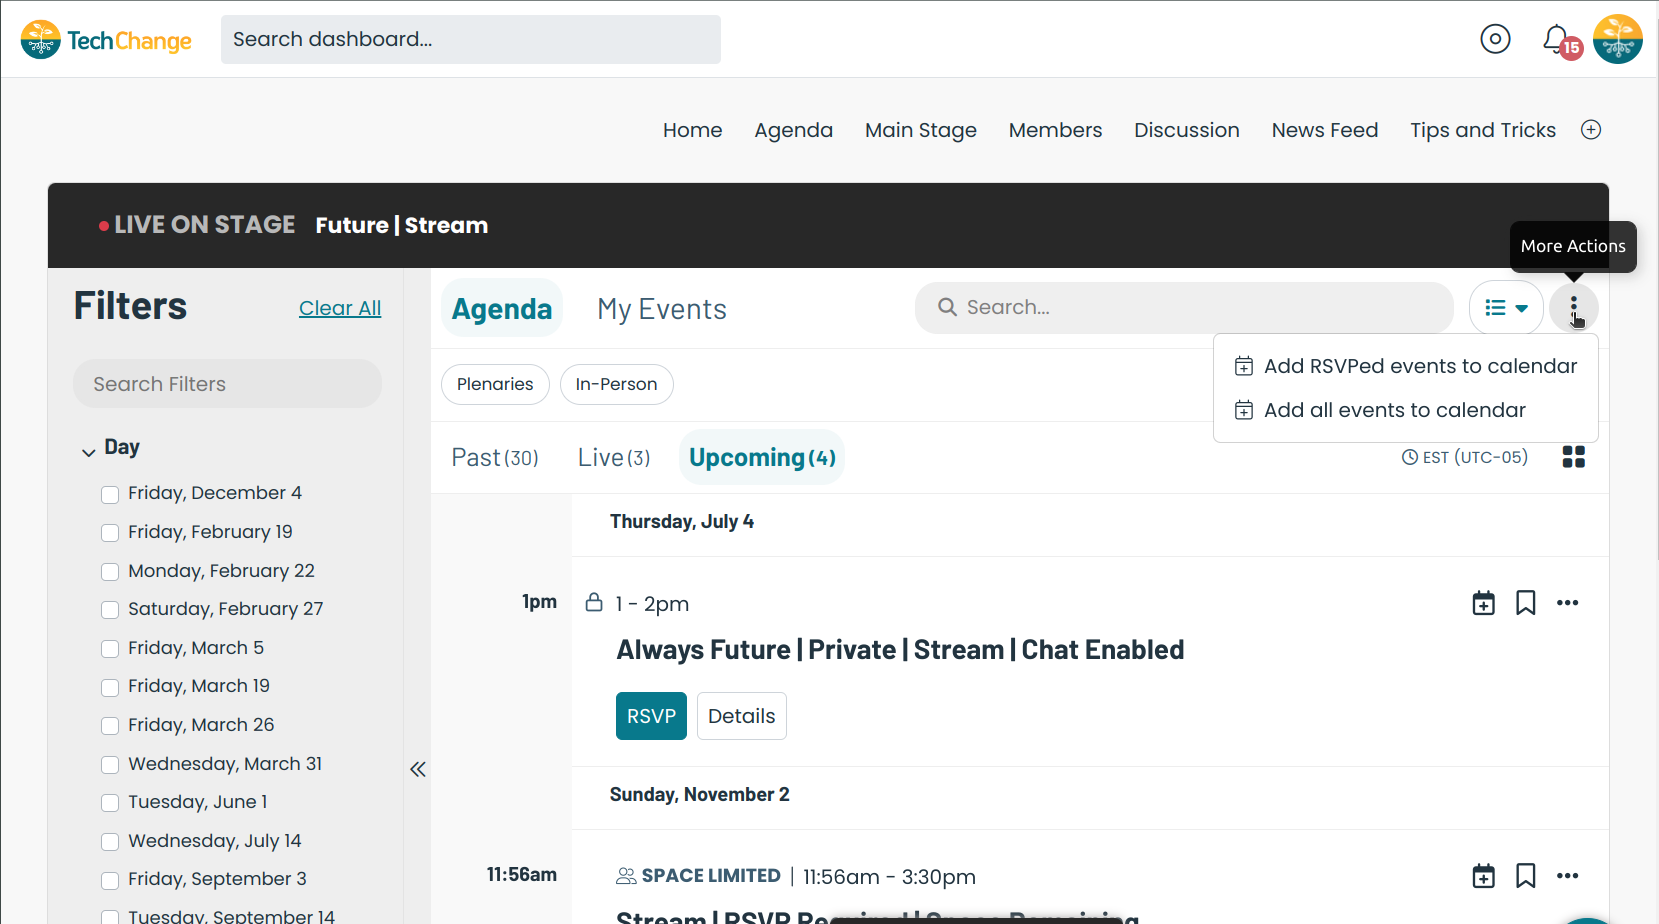
You can also add all of your RSVPed events to your personal calendar in bulk by clicking the "More Actions" dropdown in the Agenda header bar.
It is important to keep in mind that once an event has been added to your personal calendar, it will NOT be synced to the Events System. For example, if the time of an event changes on the TechChange platform, it will NOT be automatically updated in your personal calendar.
Event Chat
During the live portion of an Internal Event, users can discuss the event and ask questions using the chat feature. The chat feature will be displayed next to the event's embedded video and features three tabs: Chat, Users, and Links.
The Chat tab is where you can discuss the event, ask questions as needed, and @mention other users. The Chat tab will update in real-time for all users as messages are sent (no need to refresh the page!!!). As a facilitator, we recommend kick-starting the chat by asking users to share where they are tuning in from or to re-create their weekend in Emoji form! This helps to get the user engagement rolling for the event even before the video is ready to stream.
The Users tab is where you can see the list of all users who are also tuning into the live event. Clicking on a user will take you to their user profile.
The Links tab is where you can see a list of all the links that have been posted in the Chat tab, generated automatically from the chat content.
Event Polls
During the live portion of an event, administrators/facilitators can create poll questions for users to answer. The poll results will be aggregated and update automatically in real-time for all users as the responses are submitted. The poll results will continue to be displayed on the page when the event is archived.
See here for instructions on how to create an Event Poll.

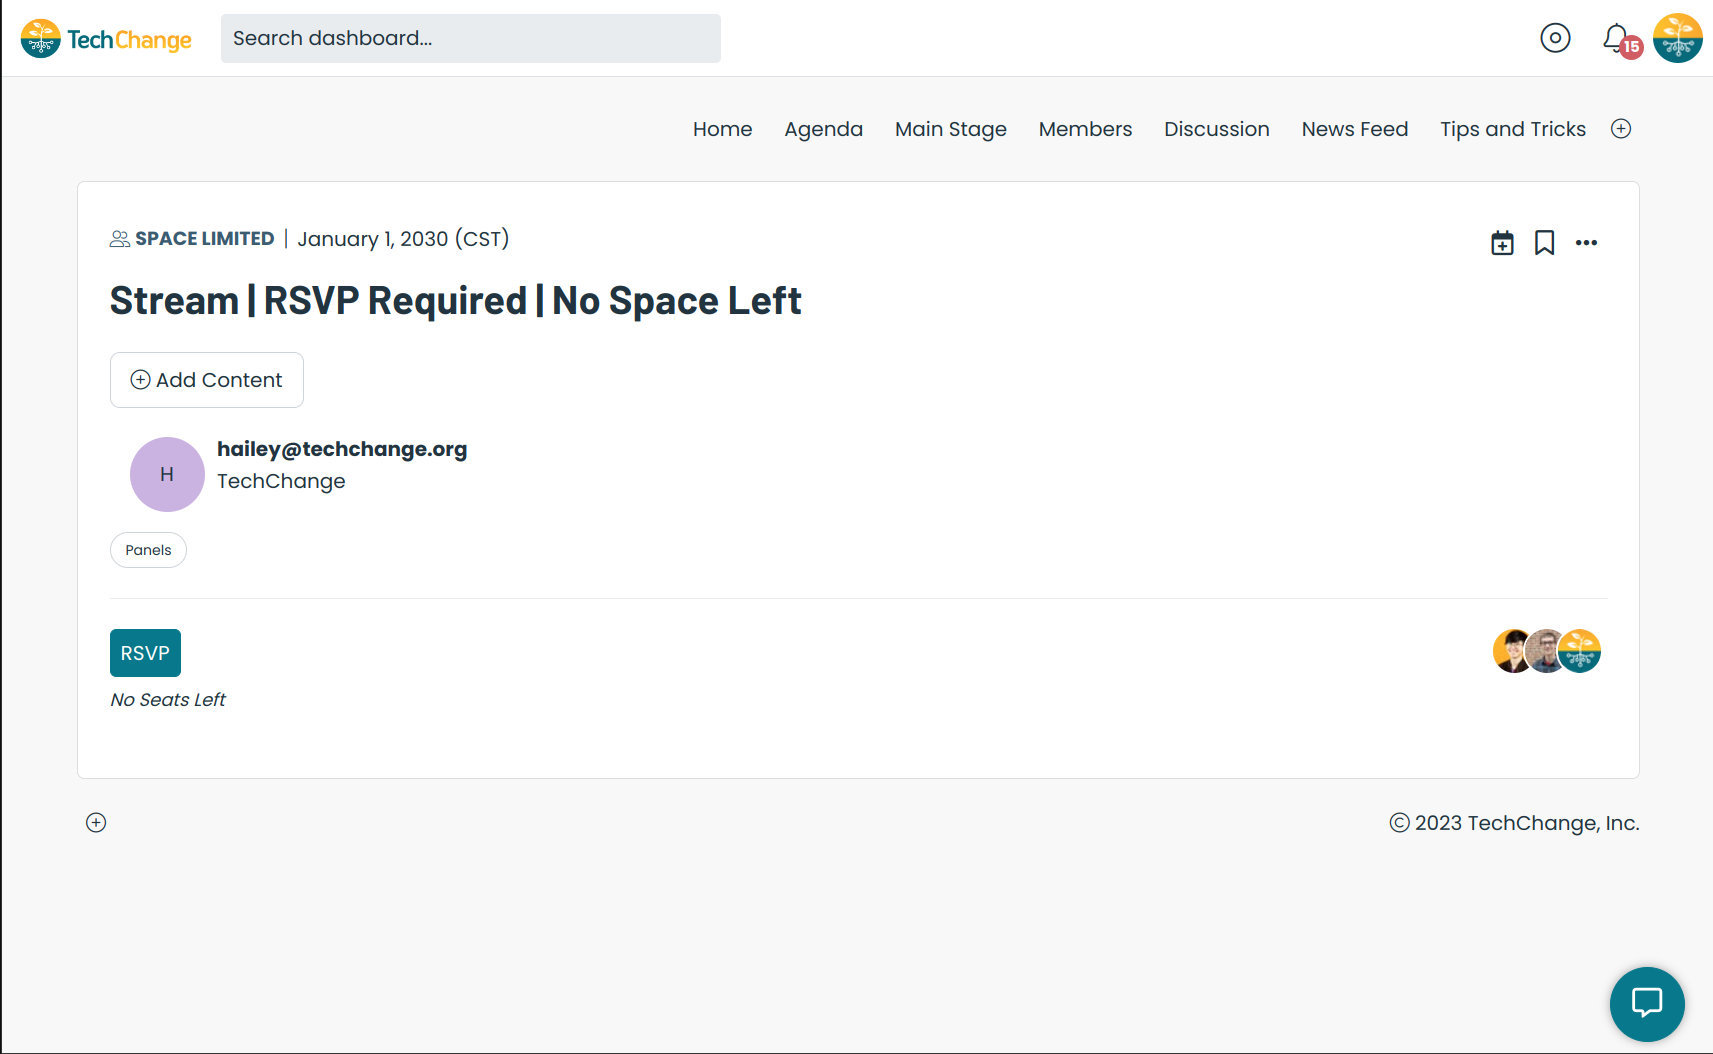
RSVP Only Events
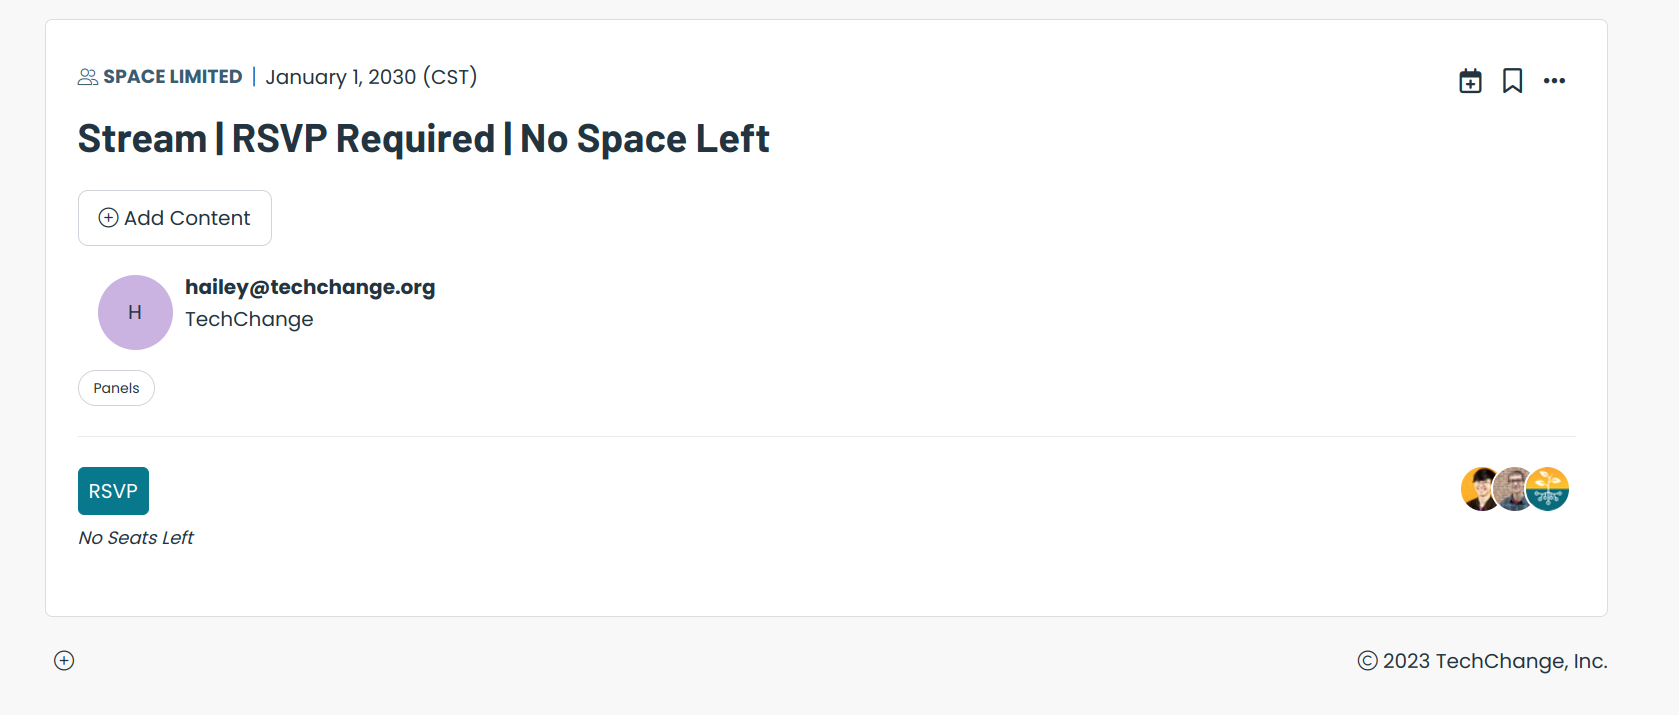
You can host an event that requires RSVPing in advance in order to attend. A maximum capacity can optionally be set for the event.
The available slots for the event will be filled on a first-come-first-service basis via RSVPs. Once the event has reached the maximum capacity, users will no longer be able to RSVP to the event, nor will they be able to attend once it goes "live". If there are remaining slots available while the event is "live", users who did not RSVP in advance will still be able to RSVP and join the event in real-time until either the maximum capacity is reached or the event ends.
Course administrators and facilitators do not need to RSVP in advance to the event in order to attend while it is "live". They will automatically bypass the restrictions and have access to the event.
It is important to note that administrator and facilitator RSVPs DO COUNT against the number of slots remaining for the event, so we recommend not RSVPing ahead of time as an administrator or facilitator.
An archived version of the RSVP only event will be available via the Event Details Page to all users regardless of whether or not they were able to attend the event while it was "live".
How to Use
Events
Creating an Event
- Navigate to the Agenda page, i.e.
https://course.tc/my-conference/events/agenda - Click the "New Event” button in the admin toolbar.
Create New Event
- Choose how you want to host the event. You can select either
InternalorExternal.Internalevents will be embedded on the platform.Externalevents will contain a link that will open outside the platform. - Enter the information for the event, including the event
Title,Date, andTime. - (Optional) Add any pre-existing topics to the event. If a topic does not exist, you can create it as described here.
- (Optional) Add any pre-existing speakers to the event. If a speaker does not exist, you can create it as described here.
- (Optional) Choose if you want to the event to be streamed live on stage. If a stage does not exist, you can create it as described here.
- (Optional) Choose if you want the event to be RSVP only. If so, choose if you want to enforce a maximum capacity for the event.
- Click the "Next" button.
Choose Hosting Options
Depending on if you chose an Internal or External event, you will have different hosting options.
For
Externalevents, you can link to a Zoom meeting or a custom URL. Note a Zoom meeting requires an integration to be set up.- You can learn more about Zoom integrations here.
- For "Other" events, add the URL which the user should click to attend the event. You can optionally add an event recording. This will show after the event has passed. You can choose to provide a URL for this field or upload a video from your computer. More information on uploading a video from your computer can be found here.
For
Internalevents, you can select "Live Stream" to set up an internal live stream, "File Upload" to upload a video directly from your computer, or "Other" to provide a link to the video. These hosting options allow you to disable the embedded chat for the event if desired.- More information on uploading a video from your computer can be found here.
- More information on creating a live stream can be found here.
- For "Other", a variety of different hosting services are supported. Please research their documentation for how to create an embedable URL for the service. Supported providers include:
- Livestream
- Microsoft
- Cinemata
- YouTube
- Vimeo
- Twitch (Docs)
https://player.twitch.tv?channel=<channel-name>https://player.twitch.tv?video=<video-name>https://player.twitch.tv?collection=<collection-name>
- Custom
- Attempt to use the URL and see if it works. If not, reach out to the Tech team for support.
Event Access
This tab allows you to limit access to events.
- Select invite only if users should only see the event if invited.
- When selected, an option to "Grant Access" to users or groups will appear. The dropdown will contain all users that have access to the session. The dropdown will also contain all groups created for the session. Select all users and/or groups that should have access to the event.
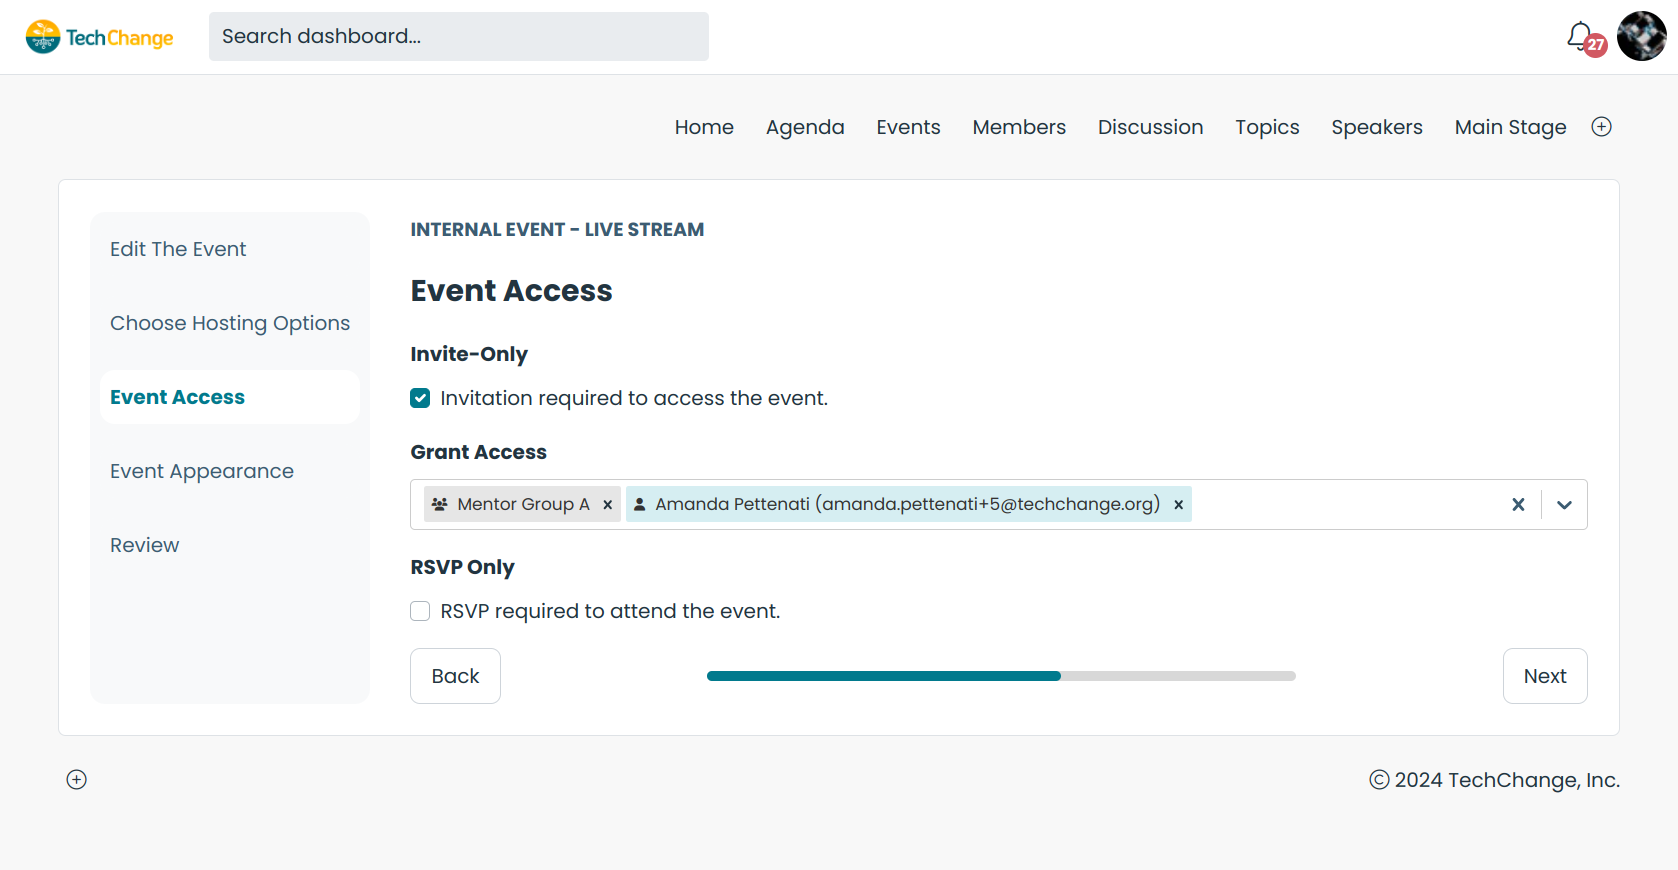
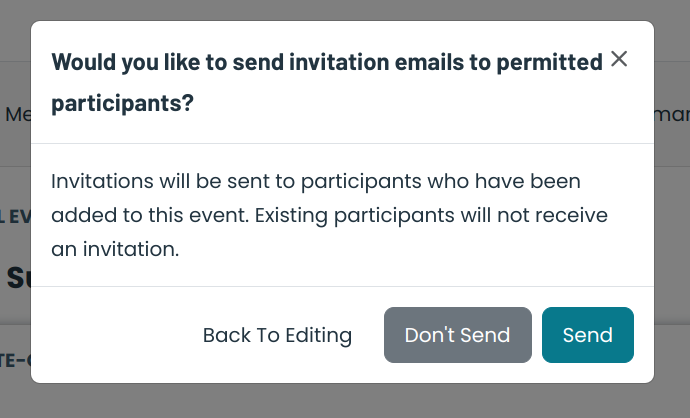
- When submitting the event, you will have the option to choose if an email should be sent to the invited users and groups. Sending an invitation will send an email and a platform notification to the users and group members.
- Note that invitations will only be sent to the users or groups added to the event during this round of editing. Users or groups that may have already been present will not receive another invitation.
- Note that if members are added to a group after the invitation is sent, they will be able to see the event, but they will not receive an invitation.
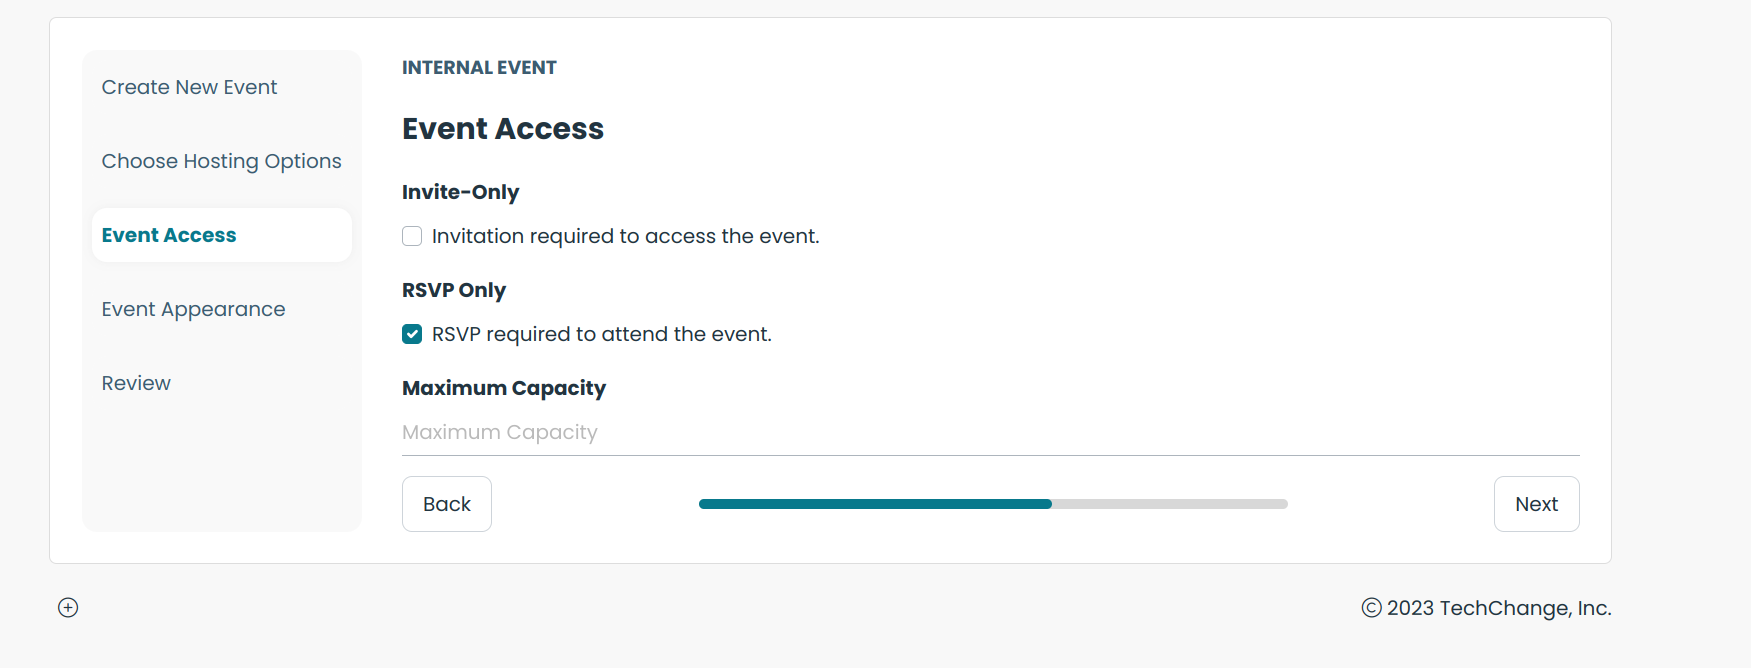
- Select RSVP Only if users should RSVP to the event in order to attend.
- When selected, an option to set a "Max Capacity" will appear. If this is left blank, no max capacity will be set.
Event Appearance
This tab contains optional settings that change the appearance of the event. Options include:
Showing expanded speaker details
Enabled:
Disabled:
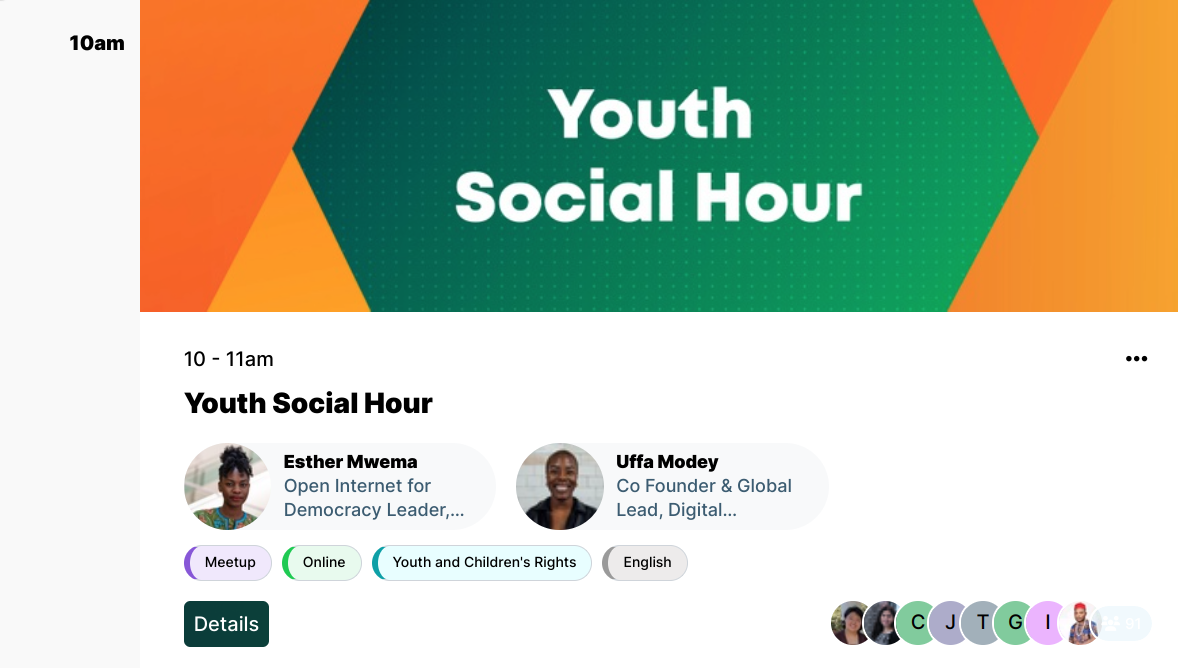
Uploading and positioning a cover image for the event.
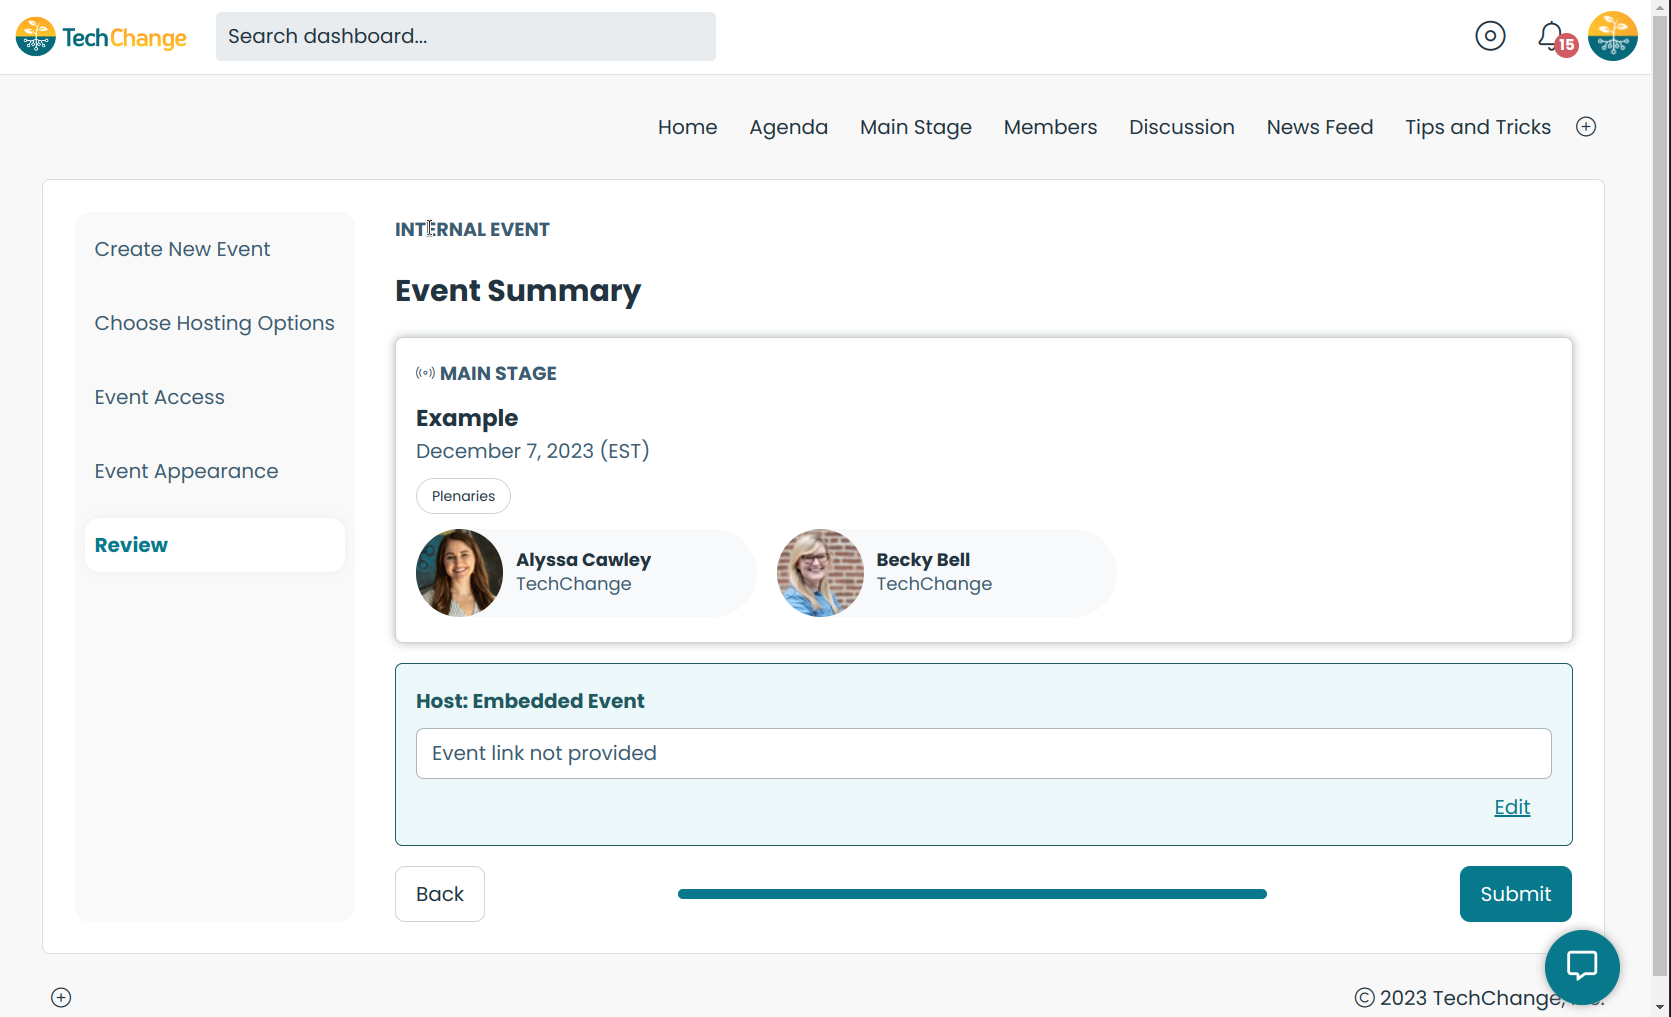
Review
- This tab will show a preview of the Event. Review the information and ensure it looks correct.
- If this is an external event, there may be a link that you can copy to share the embedded event URL if needed.
- Click the "Submit" button.
Editing an Event
- Click the "More" dropdown then click the "Edit" option in the top right of an event on the agenda page or event details page.
- Make changes as needed, described in more detail in the section above.
- Click the "Submit" button.
NOTE: Any changes made to the event will be updated in real-time for any users that are currently viewing the event!
Deleting an Event
- Click the "More" dropdown then click the "Delete" option in the top right of an event on the agenda page or event details page.
- A modal will appear on the page asking you to confirm your decision.
- Click on the "Yes, I am certain" checkbox to confirm your decision.
- Click the "I understand the consequences, delete this event" button.
Speakers
Creating an Event Speaker
- Navigate to the Agenda page, i.e.
https://course.tc/my-conference/events/agenda - Click the "New Speaker” button in the admin toolbar.
- Enter the speaker's
Name. NOTE: You can choose to re-use an existing person, if one already exists as a speaker for a different event. - Enter the speaker's
Affiliation. - (Optional) Enter the speaker's
Biography. - (Optional) Upload an image for the speaker.
- Choose the list of events for the speaker.
- (Optional) Select the user account to link to this speaker. This allows that user to make edits to the name, image, affiliation, and biography. It will also show a speaker indicator on their user profile page.
- Click the "Save" button.
Editing an Event Speaker
- Hover over the event speaker and click the "Edit" button.
- Make changes as needed, described in more detail in the section above.
- Click the "Save" button.
Deleting an Event Speaker
- Hover over the event speaker and click the "Edit" button.
- Scroll to the bottom of the page and click the "Delete this speaker" button.
- A modal will appear on the page asking you to confirm your decision.
- Click on the "Yes, I am certain" checkbox to confirm your decision.
- Click the "Delete" button.
Topics and Topic Groups
Creating a Topic or Topic Group
- Navigate to the Topics page, i.e.
https://course.tc/my-conference/events/topics - Click the "Add Topic" button.
- Enter a title for the topic.
- (Optional) Enter a short description for the topic.
- (Optional) Add a topic group for the topic or create topics from a new topic group.
- (Optional) Mark the topic as featured if you wish to display this in the featured topic bar.
- Click the "Save" button.
Editing a Topic
- Navigate to the Topics page, i.e.
https://course.tc/my-conference/events/topics - Click on the topic or topic group.
- On the topic's details page, click the "Edit" button.
- Make changes as needed.
- Click the "Save" button.

Deleting a Topic
- Navigate to the Topics page, i.e.
https://course.tc/my-conference/events/topics - Click on the topic or topic group.
- On the topic's details page, click the "Delete" button.
- A modal will appear on the page asking you to confirm your decision.
- Click the "Delete" button.
Stages
Creating a Stage
- Navigate to the Agenda page, i.e.
https://course.tc/my-conference/events/agenda - Click the "View Stages” button in the admin toolbar then "New Stage" in the modal.
- Enter the stage Title.
- Enter the slug for the stage. This is the unique URL that will be created for the stage. Note this will be generated automatically from the title and doesn't need to be changed. Note that slugs must be unique.
- Select the events to associate with this stage.
- Click the "Save" button.
Editing a Stage
- Navigate to the Agenda page, i.e.
https://course.tc/my-conference/events/agenda - Click the "View Stages” button in the admin toolbar then select the "More" dropdown in the top right corner of the stage. Select the "Edit" button from the dropdown.
- Make the necessary changes.
- Click the "Save" button.

Deleting a Stage
- Navigate to the Agenda page, i.e.
https://course.tc/my-conference/events/agenda - Click the "View Stages” button in the admin toolbar then select the "More" dropdown in the top right corner of the stage. Select the "Delete" button from the dropdown.
- A modal will appear on the page asking you to confirm your decision.
- Click on the "Yes, I am certain" checkbox to confirm your decision.
- Click the "Delete" button.
Starting a Livestream on a Stage
- Navigate to the Stage's page, i.e.
https://course.tc/my-conference/events/stages/main-stage - Click the "Go Live" button for the event that is to start being livestreamed on the stage.
- A modal will appear on the page asking you to confirm your decision.
- Click the "Go Live" button to confirm.
NOTE: Once you click this button, the page will auto update in real-time so that all users are viewing the livestreamed event.
Ending a Livestream on a Stage
- Navigate to the Stage's page, i.e.
https://course.tc/my-conference/events/stages/main-stage - Click the "End Live" button for the event that is to end being livestreamed on the stage.
- A modal will appear on the page asking you to confirm your decision.
- Click the "End Live" button to confirm.
NOTE: Once you click this button, the page will auto update in real-time so that all users are no longer viewing the livestreamed event.

Polls
Creating an Event Poll
- Navigate to the event's details page.
- Hover over the event to edit and click the "Edit" button.
- You can add an event poll to either the
Descriptionor theAdditional Informationfor the event. The eventDescriptionwill be visible 100% of the time, regardless of the status of the event. The eventAdditional Informationwill only be visible if the event status is Live or Past. If you want the Poll visible for users as they RSVP to the event, then use the eventDescriptionsection. However, if you only want the Poll visible to users when the event is live, then use the eventAdditional Informationsection. - In either the
DescriptionorAdditional Informationsection, click the "Poll" button icon. - A modal will appear on the page where you can create the poll.
- Enter a
Titleand shortDescriptionfor the poll. - Click the "Add question to poll" button.
- Select the question type from the list of options for the poll.
- Depending on the question type, enter the required information for the question, i.e.
Questiontext,Descriptiontext,Optiontext, etc. - Repeat steps 7-9 as needed until all questions are complete.
- Click the "Save" button.
- Scroll to the bottom of the page and click the "Submit" button.
Editing an Event Poll
- Navigate to the event's details page.
- Hover over the event to edit and click the "Edit" button.
- Hover over the poll and click to edit.
- A modal will appear on the page where you can edit or delete the poll.
- Make changes as needed, described in more detail in the section above.
- Click the "Save" button.
- Scroll to the bottom of the page and click the "Submit" button.
Deleting an Event Poll
- Navigate to the event's details page.
- Hover over the event to edit and click the "Edit" button.
- Hover over the poll and click to edit.
- A modal will appear on the page where you can edit or delete the poll.
- Click the "Delete this poll" button.
- Scroll to the bottom of the page and click the "Submit" button.
Additional Information
Cloning
If you are creating a new conference from an existing one, existing events will NOT be copied over during the cloning process.
Activity Tracking
The following event activities are tracked on the platform:
- Creating events
- Updating events
- Attending events: This activity refers to attending a Live Event, i.e. visiting the event's page while the event is live. NOTE: This is not for events that are marked live on a stage.
- RSVPing to events: Both "attending" and "not attending" RSVPs will be tracked.
- Viewing archived events: This activity refers to viewing a Past Event, i.e. visiting the event's page and clicking play on the archived video.
The following event activities will appear in the Activity Feed:
- Creating events
- RSVPing "attending" to events
Points
If points are enabled for your organization, you can award users points for the following actions:
- Attending/RSVPing to an event
- Select the
eventobject type and corresponding action
- Select the
- Viewing an archived event
- Select the
archived-eventobject type and corresponding action
- Select the
Global point rules can be set up from the administrator portal. Session-specific point rules can be set up on the conference settings page. See the section "Setting Up Points" for more information.