How to Create a Customizable Profile Form
The User Profile page contains space for a fully customizable Profile Form. As an administrator, this Profile Form allows you to create a series of questions that will be used to collect additional information about your students and allow them to better connect with one another.
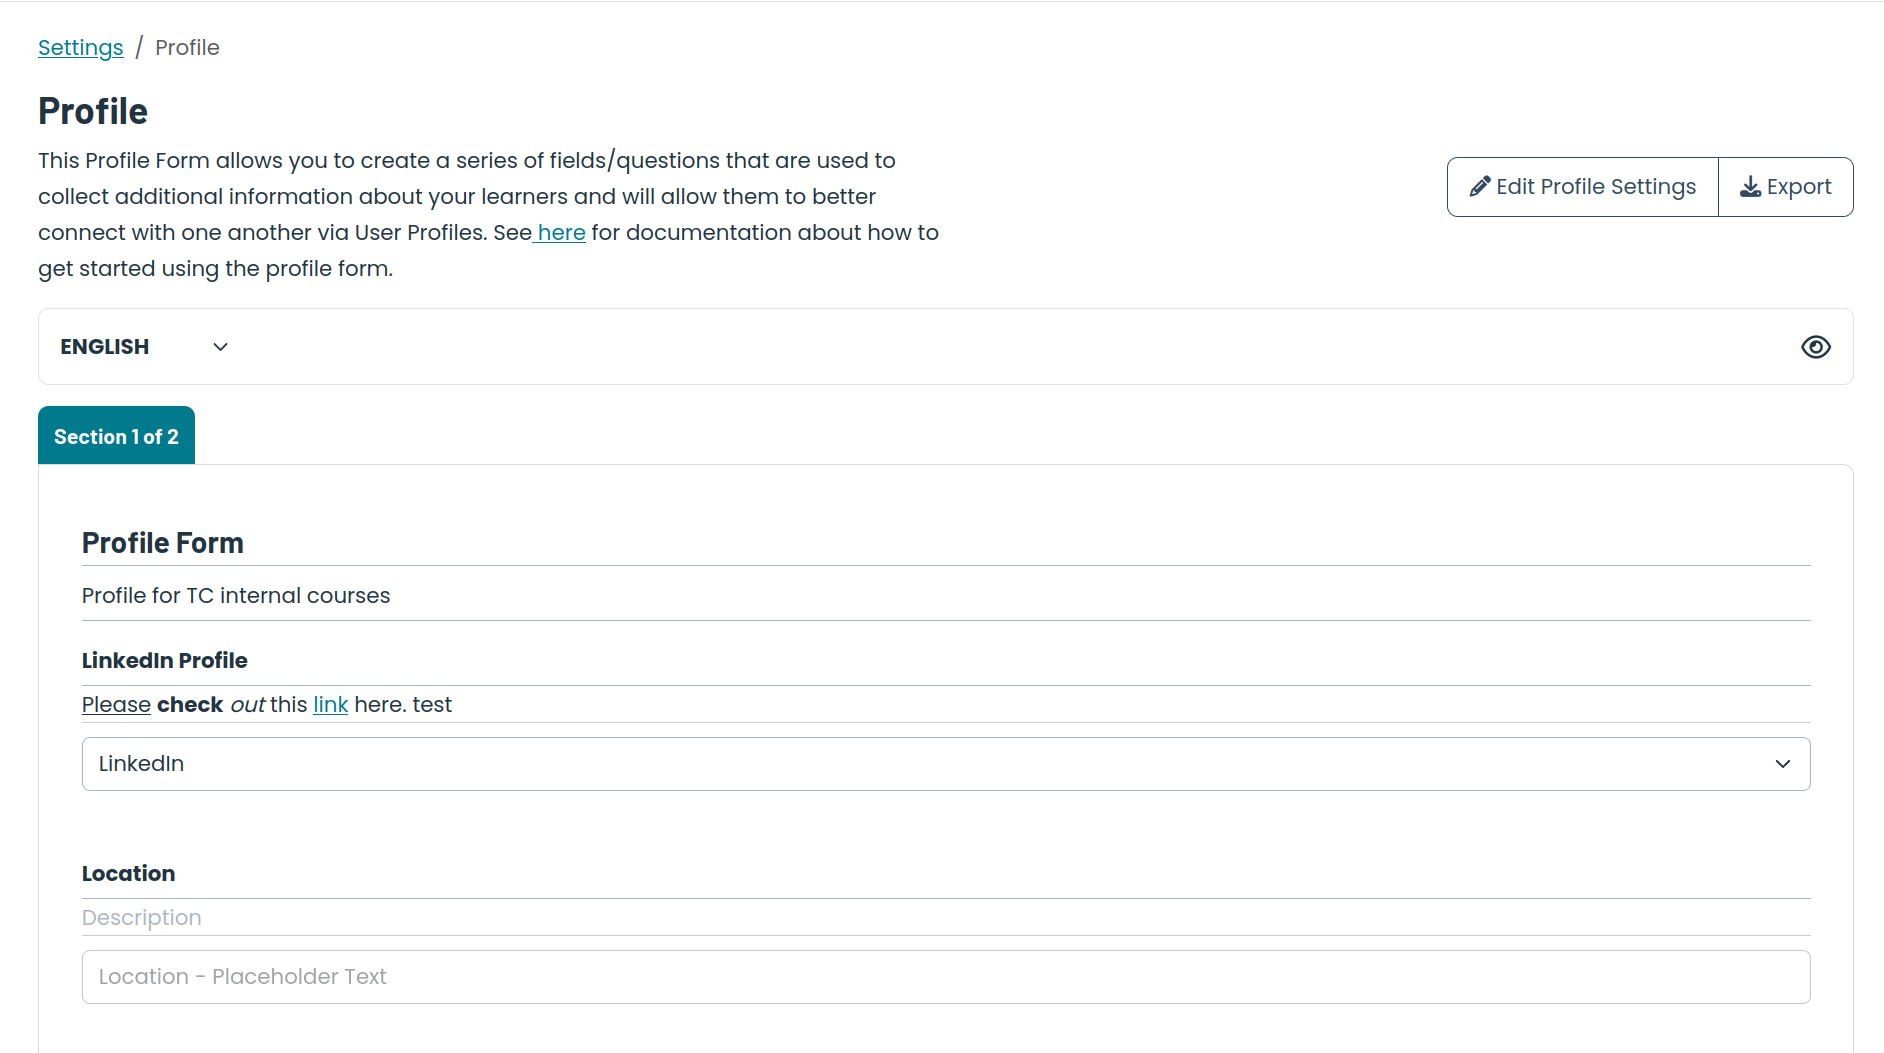
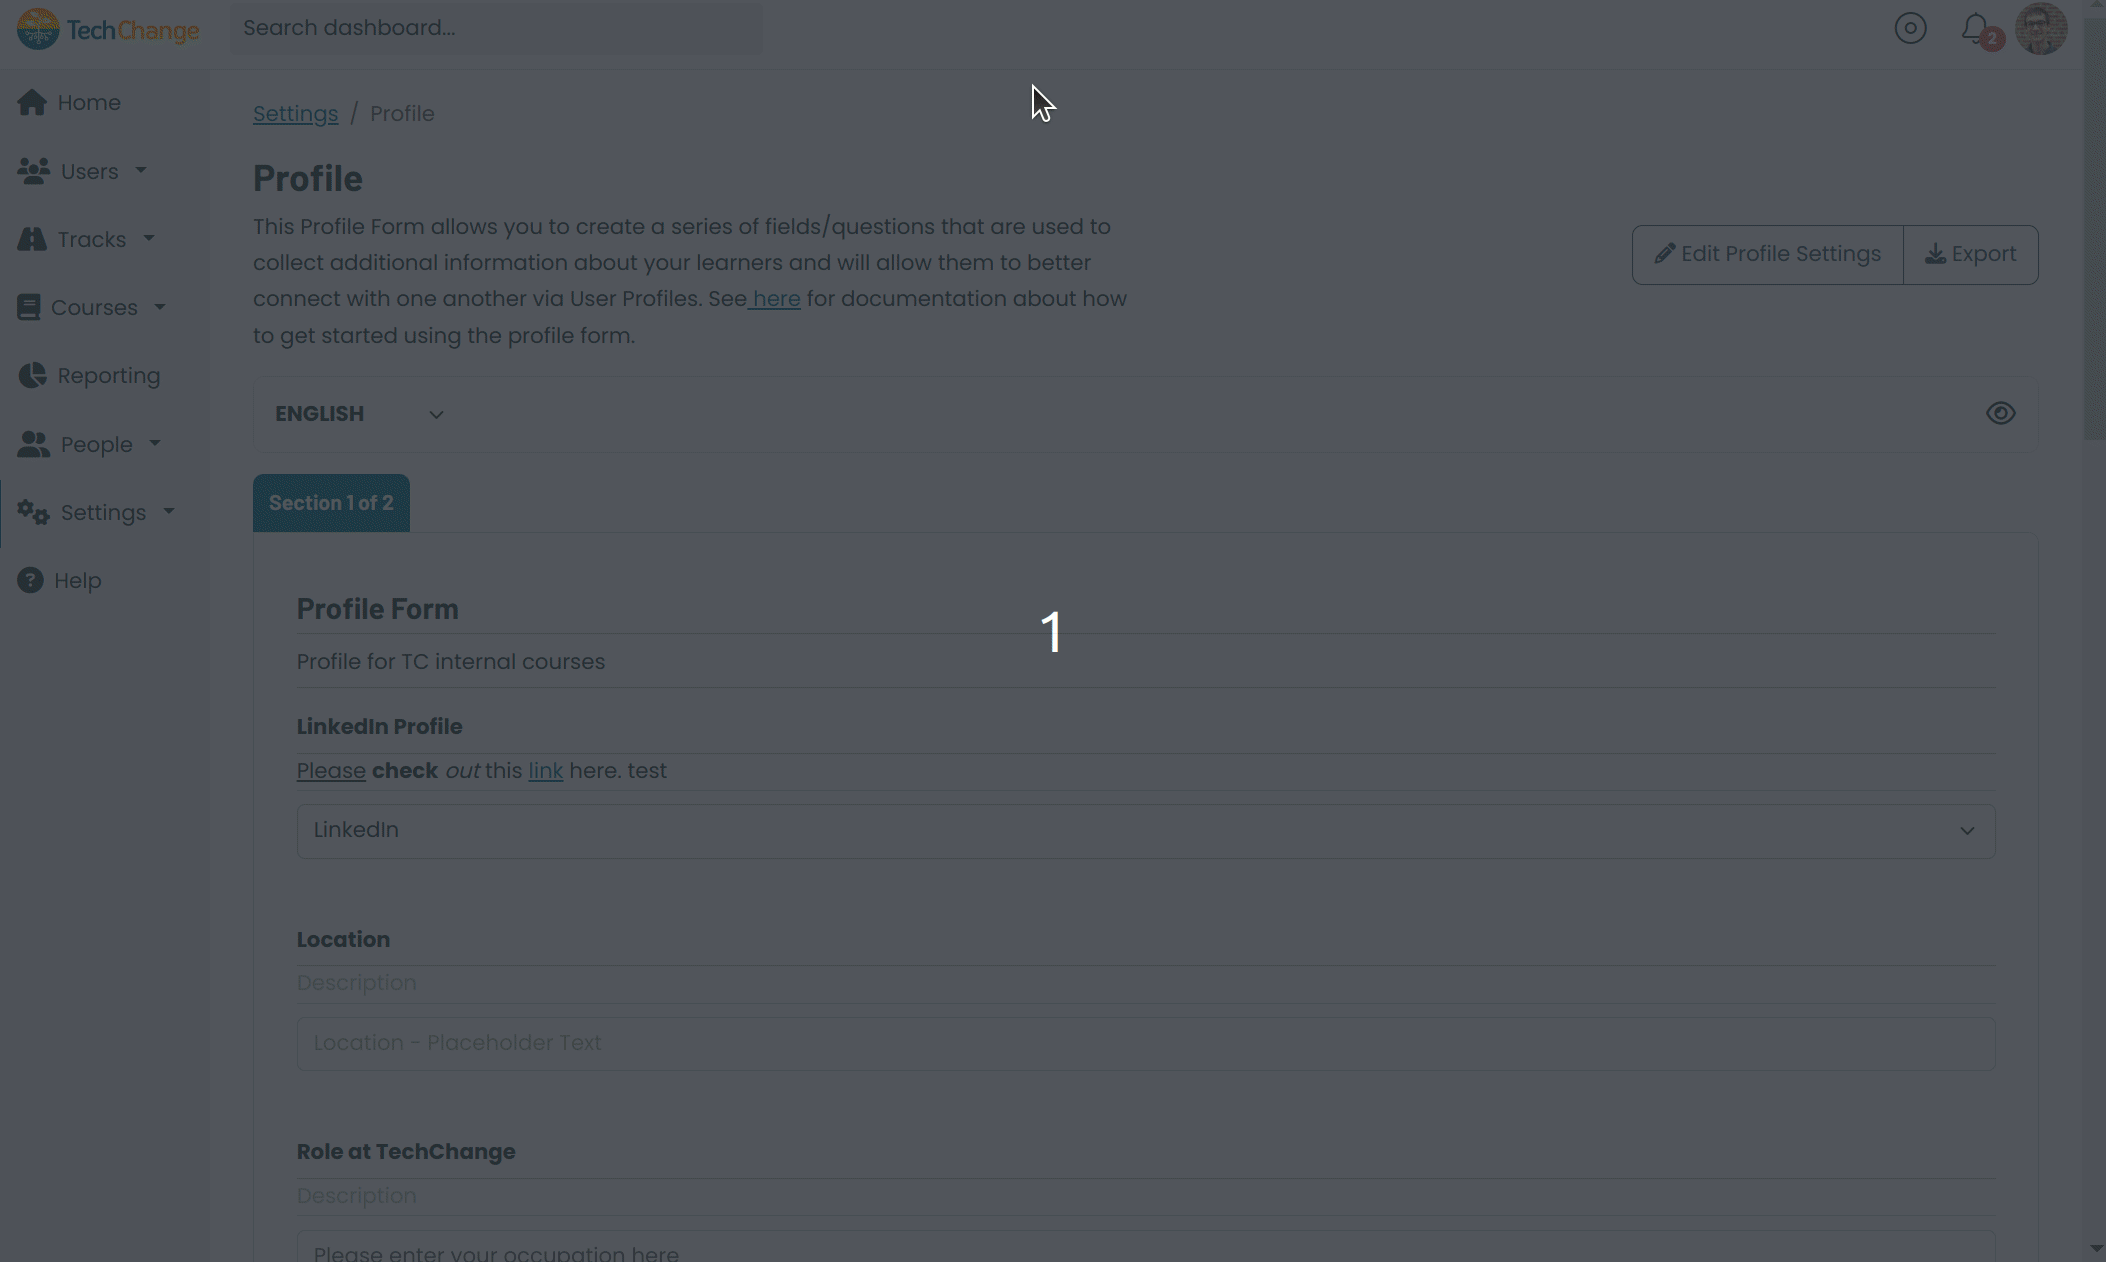
Navigate to the Profile Form editor in the Admin Dashboard
- Navigate to the admin dashboard, i.e. (https://***[your_domain]***.course.tc/admin)
- Click Settings in the left menu.
- Click Profile in the dropdown menu.
- You will now see the Profile Form editor page.
Types of Questions
Basic Questions
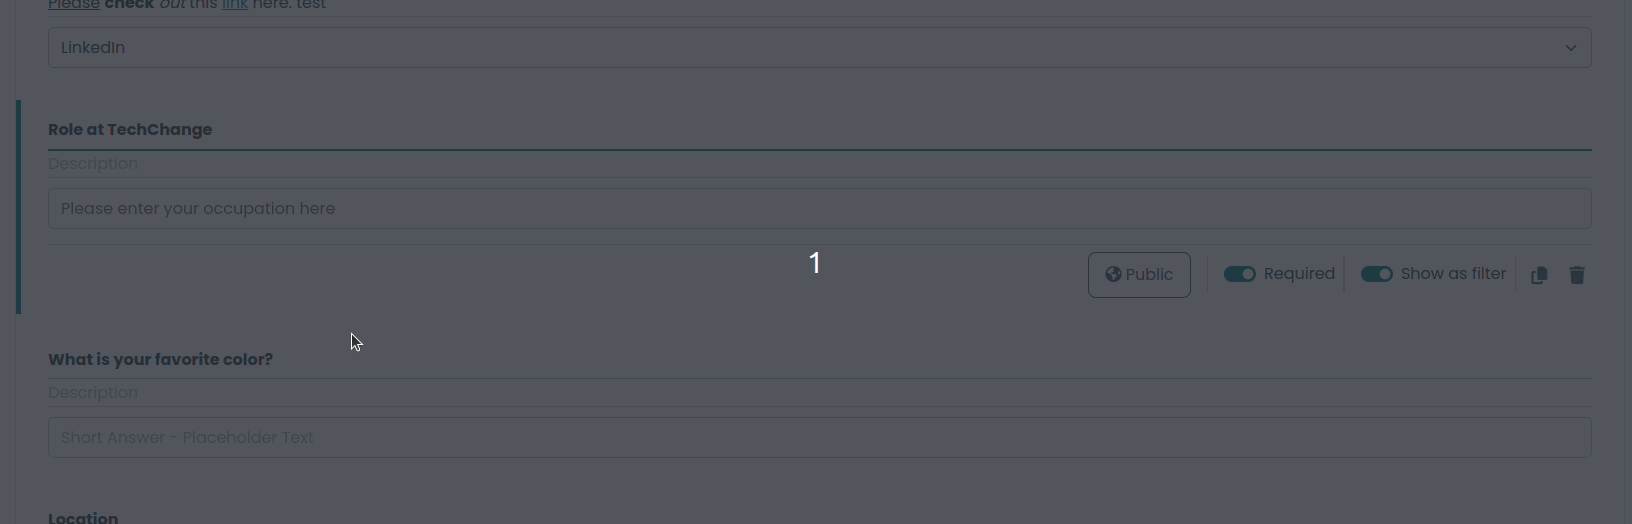
- Short Answer: Use for short text, such as the user's name.
- Paragraph: Use for long text, such as the user's biography.
- Email: Collect email address text.
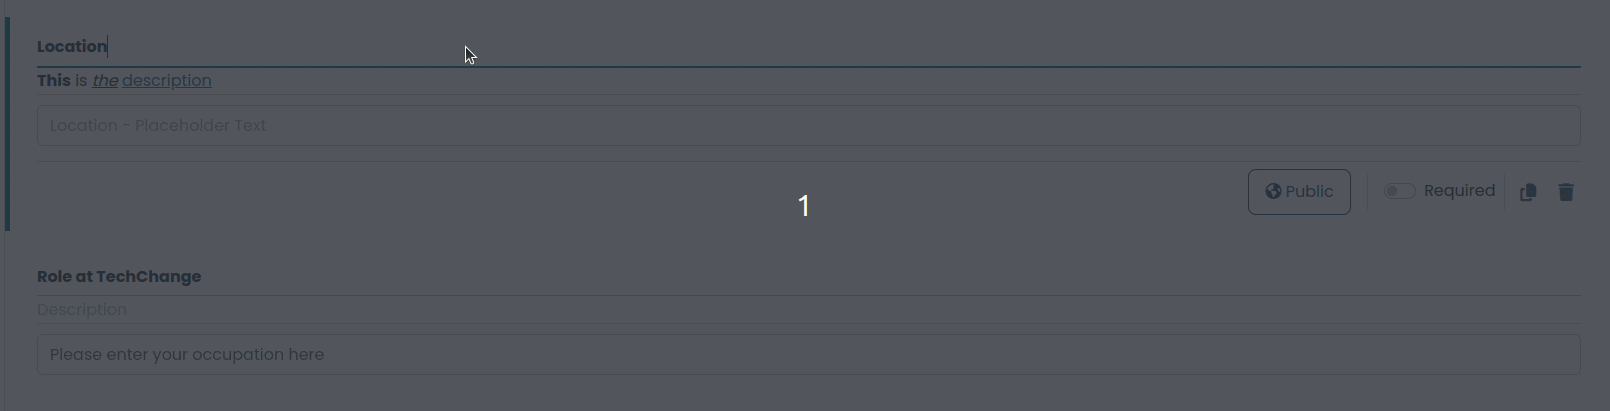
- Location: Collect location data. If enabled, user location can be displayed on a map on the Members Page.
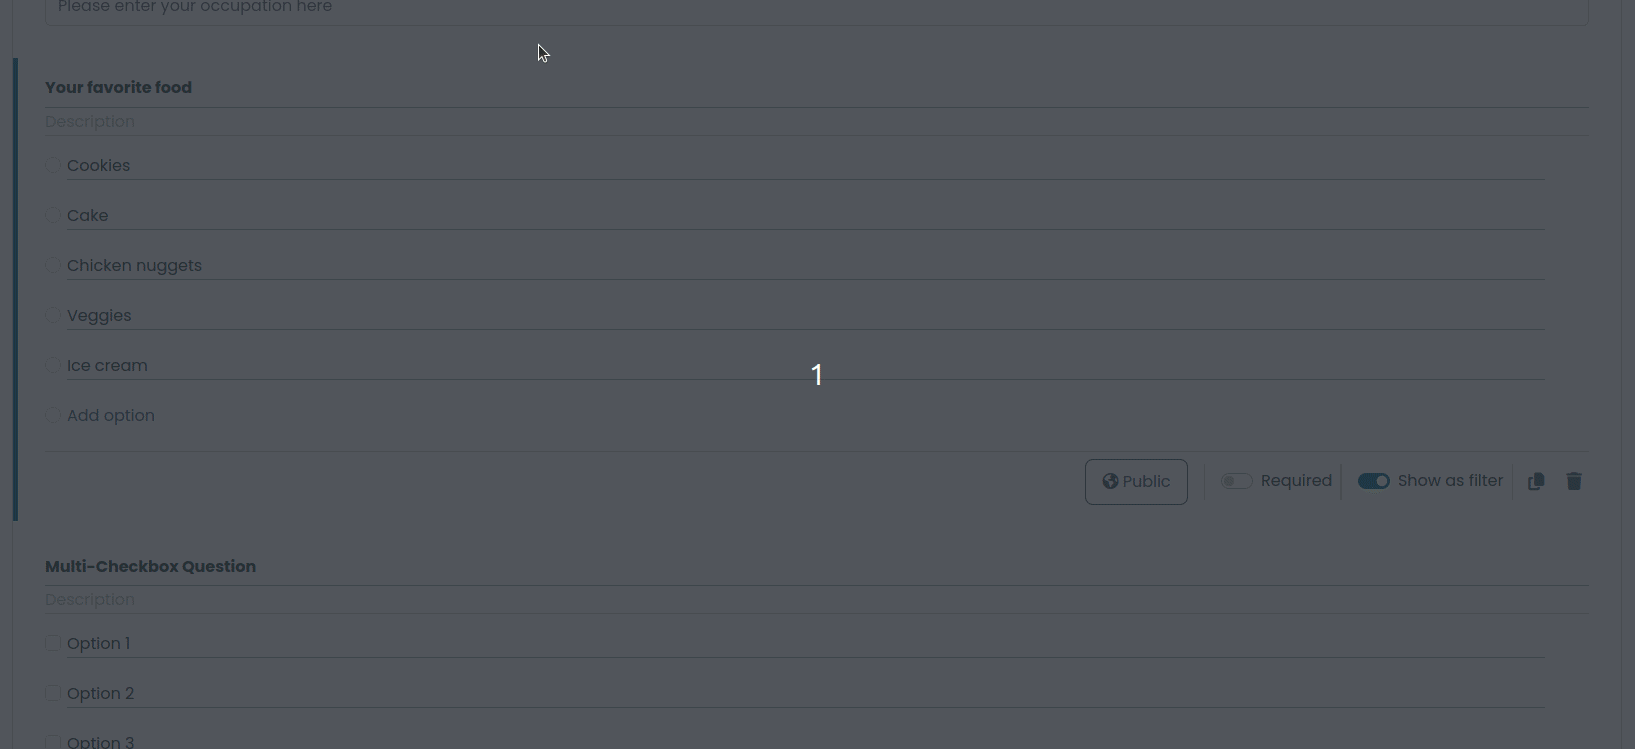
- Multiple Choice: Choose one option from a pre-determined list of options.
- Dropdown: Select one option from a pre-determined list of options.
- Checkbox: Check a box associated with a statement or question.
- Checkboxes: Check multiple boxes, each associated with a different statement.
- Likert Scale: Select an option in a range of likert options.
- Social Media: Collect an email address or a link to the user's Facebook, LinkedIn, and/or Twitter profiles. If enabled, the social media information for each user can be displayed on the Members Page.
In order for the user's location to appear on the map on the Members Page, you must use a Location field. Double check that you are not using a Short Text field labeled "Location" by accident.
Layout Elements
- Section: Use sections to segment the questions in the profile form based on theme/type/etc.
Create the Profile Form
Add a Question
- Choose a field type from the list of options on the left side of the form editor. When you are ready, click "Add Question to Section".
- A group of inputs will be added to the form, which allow you to customize the question. The customizable options will vary by question type, but the following options are generally available:
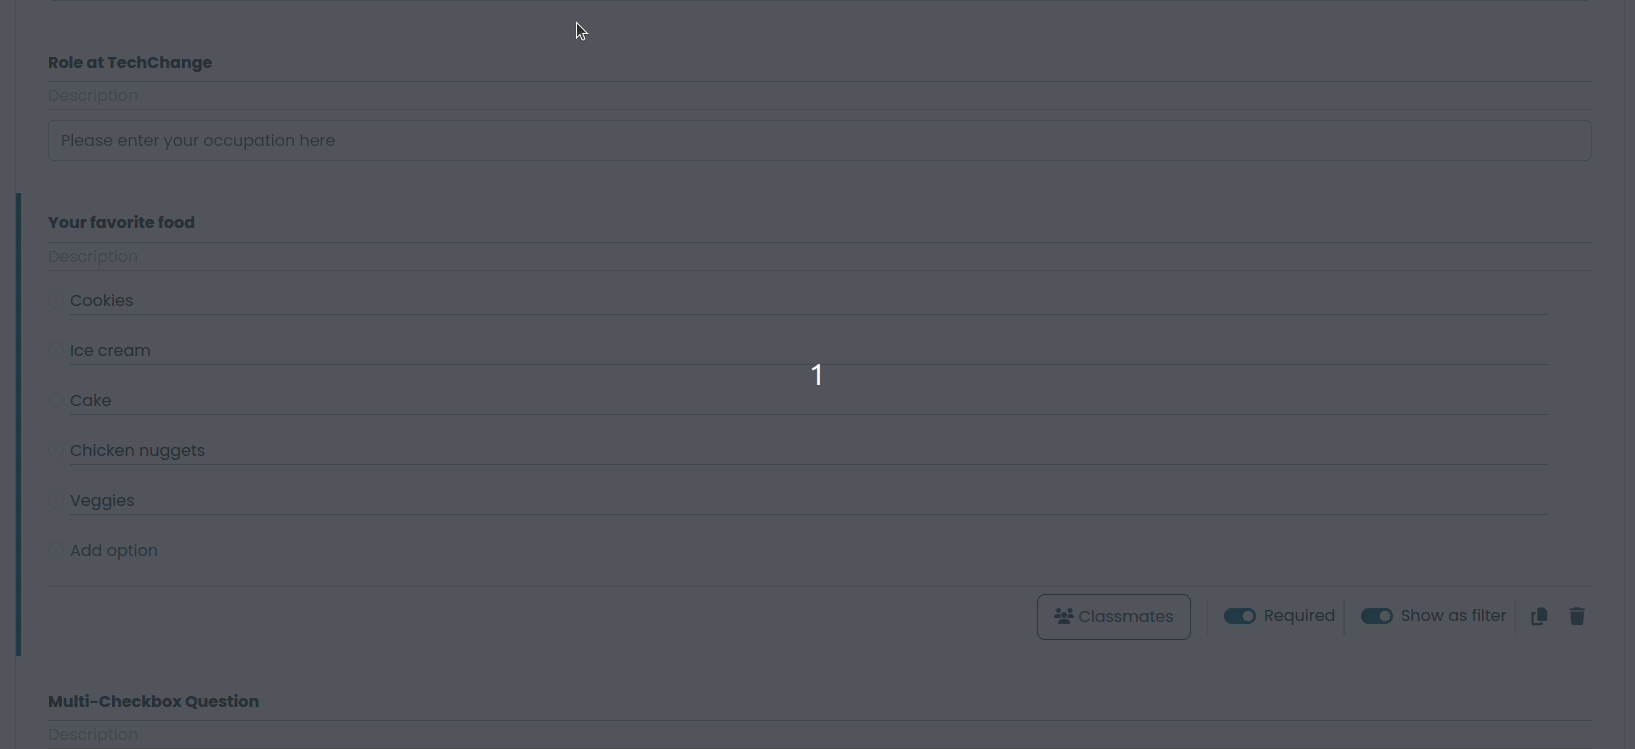
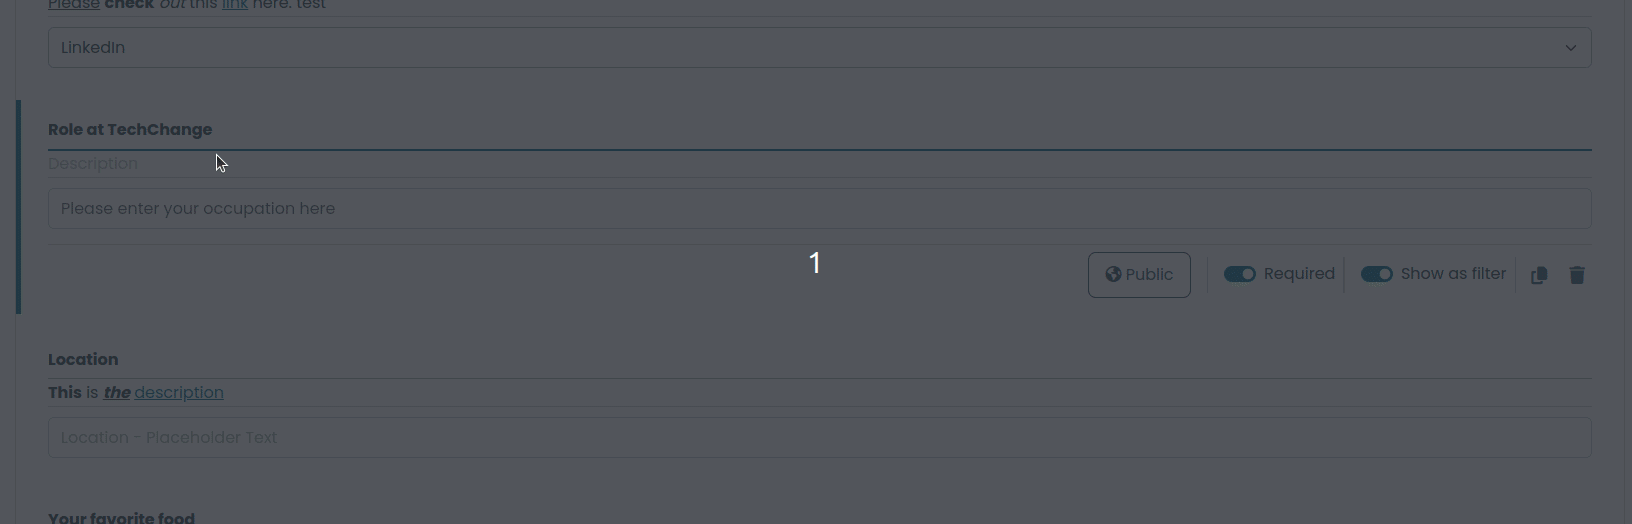
- Label: This serves as the title for the question. You must enter a field label.
- Placeholder: (Optional) This text sits in the question input until it is replaced by the user's text or selection.
- Description: (Optional) This text is displayed below the question input. This often contains helper text.
- Settings - Required: If you check this box, the user will need to respond to this question in order to submit an entry. We do not recommend requiring profile questions.
- Privacy: As an administrator, you can choose the privacy setting which controls who can see the responses to a question. See the privacy options below for an explanation of how this will work. The student can always choose a more restrictive option when submitting their entry than what you choose here, but they will not be able to choose a less restrictive one. You must set a privacy level.
- Facilitators: Responses will only be visible to the original student and any administrators/facilitators.
- Classmates: Responses will only be visible to other students who are enrolled in the same course(s) as the original student.
- Public: Responses will be visible to any student who is a member of your organization on the TechChange platform.
- NOTE: For questions with multiple options or answer choices, such as Checkboxes, Dropdown, and Multiple Choice, the group of inputs will require adding options.
- Add the first option where it says "Option 1."
- Click the "+" button to add another option.
- Click the "-" button to remove an option.
- NOTE: For the Social Media field, you will need to choose the type of social media. At this time, the options are Email, Facebook, LinkedIn, and Twitter.
- When you are done customizing the question, click the "Save" button at the bottom of the modal.
- You can click on the "Preview" eye icon in order to view the Profile Form as you are building it.
Reorder a Question
- Click and hold the "Move" icon (represented by a grid of 6 dots) on the left side of the question
- Move the question to the desired position in the form. Changes will be automatically saved as soon as you drop the question into the new position.
Create Copy of a Question
This is useful when you have many similar questions - you can simply create a copy of a previous question and then make changes.
- Click the "Duplicate" icon (represented by two pieces of paper) on the right side of a question.
- The new question will appear directly below the original in the Profile Form.
- You can then make changes to the new question.
Delete a Question
- Click the "Delete" icon (represented by a trash bin) on the right sode of a question.
- The question will be removed from the Profile Form.
Profile Form usage with the Members Page in a Course
As mentioned above, data collected in the Profile Form can be displayed on the Members Page in a course. See here for more information on the Members Page.
The type of information that can be used on the Members Page includes:
- The Location question, which can be used to create a map visualization of all user in the course.
- The Social Media questions, which can be used to display the contact information for a user in the course.
- You can also choose up to three questions from the Profile Form that will be displayed for each user in a course.
- Click the "Edit Settings" button at the top right of the form editor page for the Profile Form.
- Choose up to three of the questions from the Profile Form to display on the Members Page in a course.
Once you have chosen the type of information from the Profile Form that you would like to use on the Members Page, save your own user profile, navigate to the Members Page in a course, and verify that the Location, Social Media, and/or Three Custom Questions are being displayed on the page as expected. Reach out to your Account Manager for any troubleshooting as needed.